

JMS Sender and Receiver Adapters In SAP CPI
Introduction
JMS Sender and Receiver adapters are used to facilitate asynchronous message transfer. The message is temporarily stored in a queue and scheduled for processing. Let’s have a look at this scenario, a demo flow in SAP CPI is given below.
Table Of Content
Creating A Sender Flow
Step 1: Create an integration flow artifact.

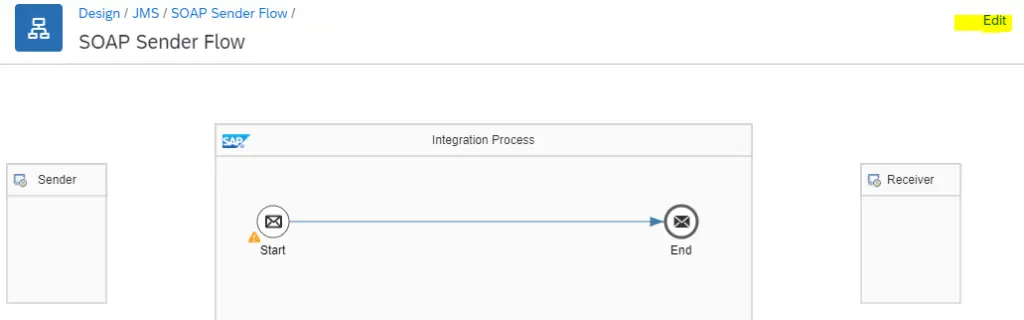
Step 2: Open the Artifact and click on Edit.
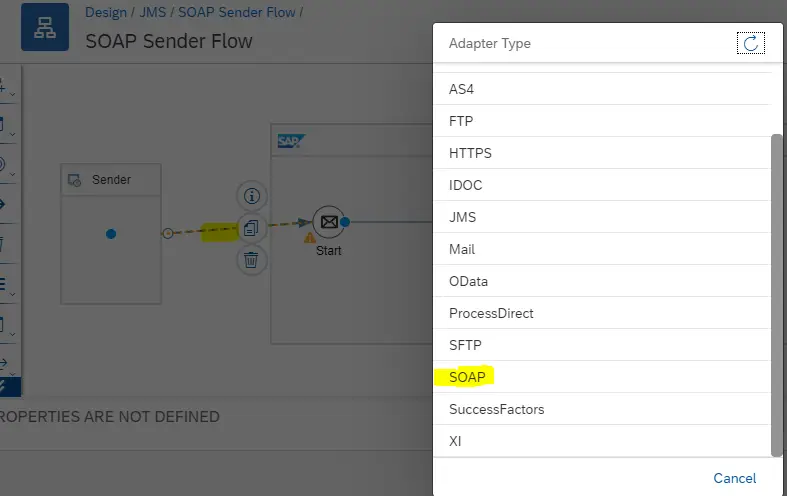
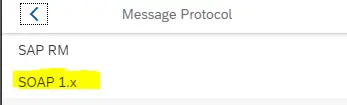
Step 3: Connect Sender to Start Event. From the Pop up, select SOAP adapter–> SOAP 1.x
Step 4: Connect the End event to the Receiver. From the Pop up choose JMS Adapter.

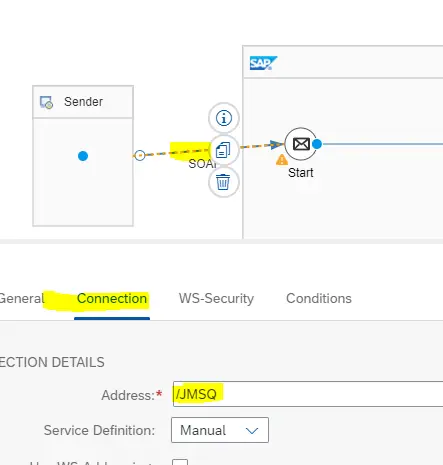
Step 5 : Click on SOAP Sender Channel and under Connections, Enter a Valid address ( /JMSQ ) to create an Endpoint to access the Flow.
Step 6: Click on the JMS Receiver Adapter. Under Processing Tab, Give a valid Queue Name ( JMSQUEUE ). The Same Name has to be used in JMS Sender Channel to access it ( Will be shown in the next steps ).
Step 7 : Save and Deploy.

Note that we have not yet created the second Flow with JMS Sender Adapter ( A Receiver ). In this case, the Content will be stored in JMS Queue.
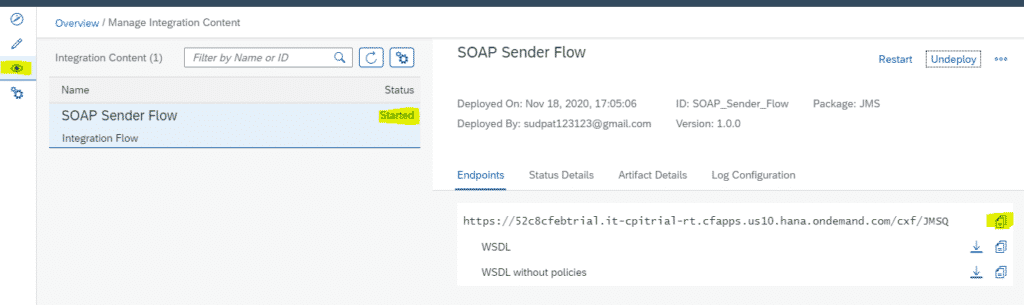
Step 8: Go to the Overview window and make sure that the deployed flow is Started. Copy the Endpoint from the Endpoints tab as highlighted below.
POSTMAN Setup
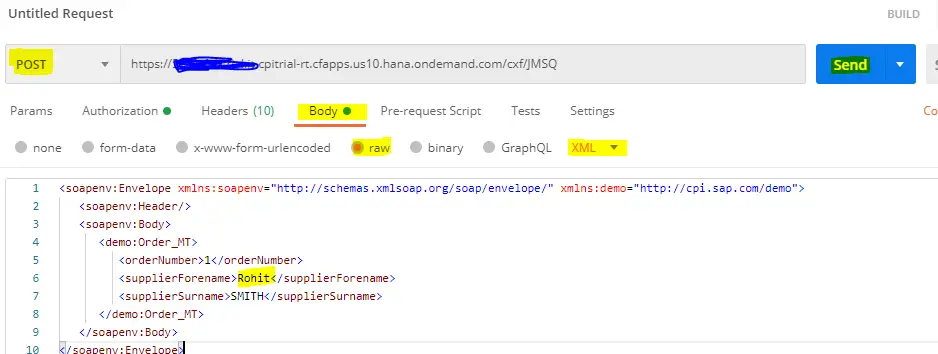
- Step 9: Open the Postman app.
- Keep the request in POST mode.
- Paste the Endpoint copied in Step 8 in the URL tab.
- Check raw radio button and choose XML message format.
- In the Authorization tab, Choose TYPE: Basic Auth
- Username: Client ID
- Password: Client Secret
- The client id and client secret you will get when you create Instance of Runtime during tenant setup. ( Refer Step 34 of this post )
- In the Body tab, Enter the Message to be passed.
- Click on Send.
Step 10: In the Overview window, you will see 1 message in the Success state.
Creating Consumer Flow
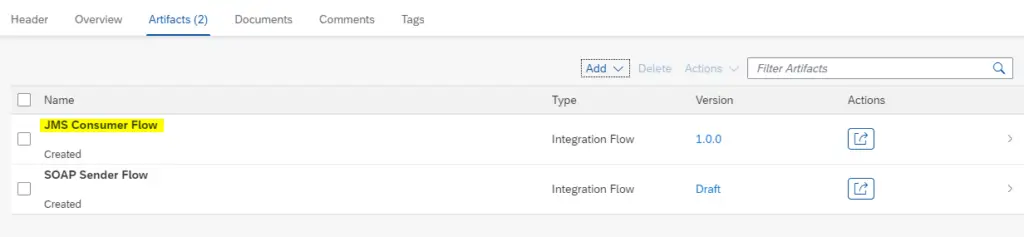
Step 11: Create another artifact to consume the stored message in the JMS queue.
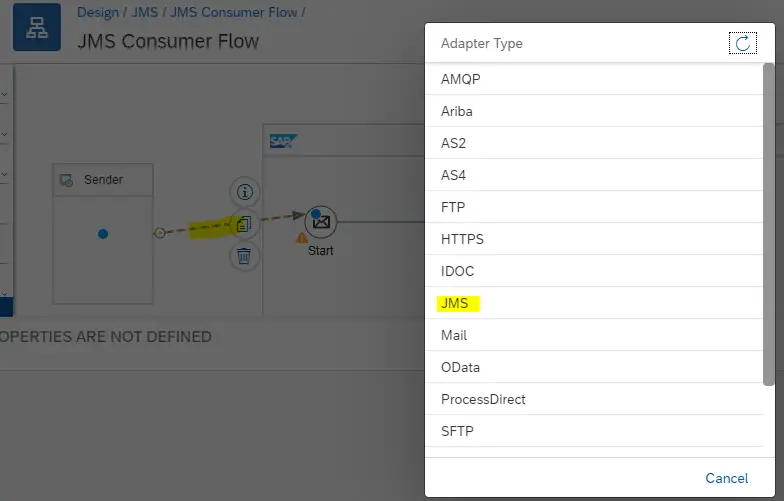
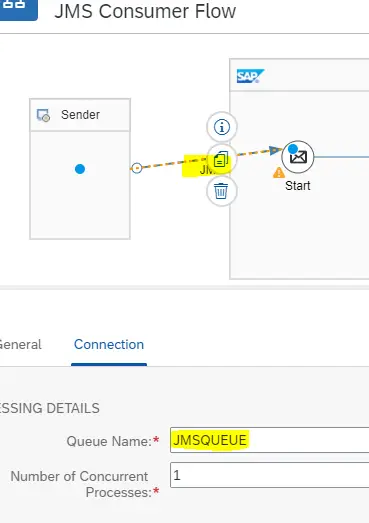
Step 12 : Open the artifact in Edit mode. Connect Sender to Start Event. From the pop-up, Select JMS adapter.
Step 13 : Select a groovy script from Pallet to your left to log Payload.
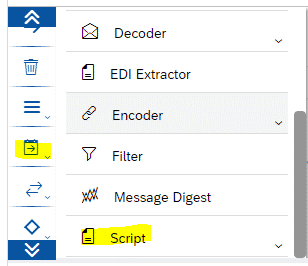
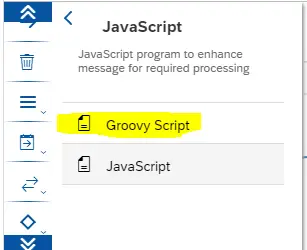
Step 14 : Click on the highlighted sign of Groovy Script to write script code.

Step 15 : Write the below script by removing the preexisting sample code. Click on OK.
import com.sap.gateway.ip.core.customdev.util.Message;
import java.util.HashMap;

def Message processData(Message message)
{
    def body = message.getBody(java.lang.String) as String;
    def messageLog = messageLogFactory.getMessageLog(message);
    if(messageLog != null)
    {
        messageLog.setStringProperty("log1","Printing Payload As Attachment")
        messageLog.addAttachmentAsString("log1",body,"text/plain");
    }
    return message;
}
Step 16: Select the JMS Adapter and under the Connection tab, Give the address of the Queue from where you want to fetch the data. Since we have stored data in JMSQUEUE in the previous flow. In this flow let us fetch from the same Queue. Therefore give the same Queue name.
Step 17: Save and Deploy the artifact.

Step 18 : Check Overview Window. Now you will see 2 messages in the Success state in place of 1.
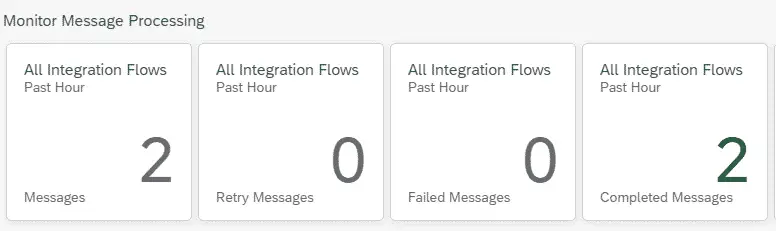
Note that you have not triggered any message after deploying the second artifact. Since there was already a message triggered to first Flow, that message was stored in JMS Queue and was available for any flow to consume. As we have given the address of the same JMS queue in the Second artifact, it fetches the data from that queue.
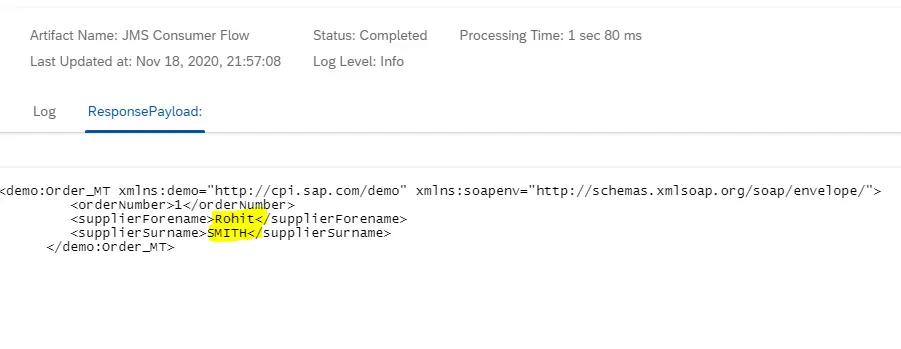
Step 19 : In order to understand better, open the successful messages, and in the second artifact under the attachments tab you will find the payload. Click on it to open the payload.

Step 20: From payload, verify the content if it’s the same as it was triggered from POSTMAN to the First artifact via SOAP channel in Step 9.
Conclusion
From this, it is clear that whenever you send any data via JMS adapter, in case the receiver is not available/not reachable, the JMS will store the message in its queue and retries to deliver until either the receiver is available or it times out.
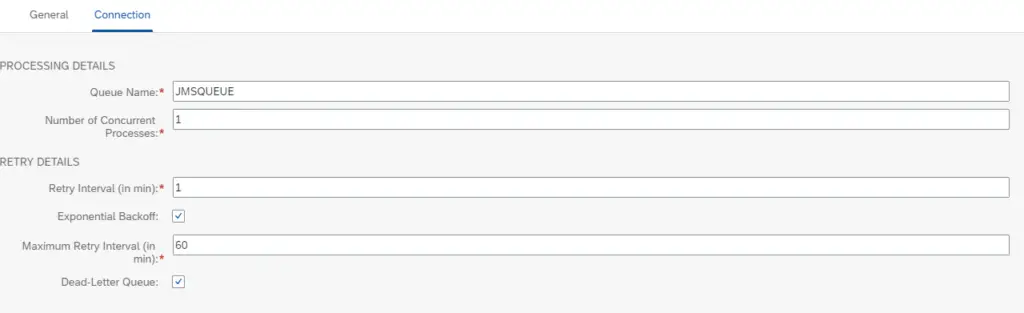
If you check the Default Connection settings of the JMS adapter, the Adapter will retry sending the message every 1 min. If you have checked the Exponential Backoff button, The retry interval doubles for each successive retry. ( Eg., 1min,2 min,4 min, 8 min, and so on) till the value specified in the Maximum Retry interval is reached ( 60 mins in this case ). After that, the message is deleted from the queue.
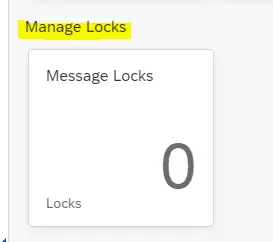
Checking the Dead letter Queue will let your message be in a locked state if there are 2 successive memeory errors/ worker node failure in case of large messages to avoid unnecessary traffic congestion. The lock can be removed from the Monitoring window under Manage Locks Tile.
FINAL VERDICT :
In conclusion, I hope you enjoyed reading this article on “JMS Sender and Receiver Adapters In SAP CPI ”, If yes, then don’t forget to spread the word about it. Do send the feedback and to know more about it. Signing off Sudarshan


