

Connect Google Analytics to WordPress
GETTING STARTED
Google Analytics helps to understand the traffic a Web Analysis tool from Google. In detail, Google has launched in 2005, so why this is so special? This tool helps you with a detailed understanding of your customer and USP. So as a WordPress user this gonna really help you to easily analyze your traffic from the Dashboard.
Table Of Content
PREREQUISITES
- Basics of Google Analytics
- WordPress Installation
Step 1: Search Google Analytics and go to analytics.google.com

Step 2: You will be now in Google Analytics home page, and can see an option to Sign up. Click on that.

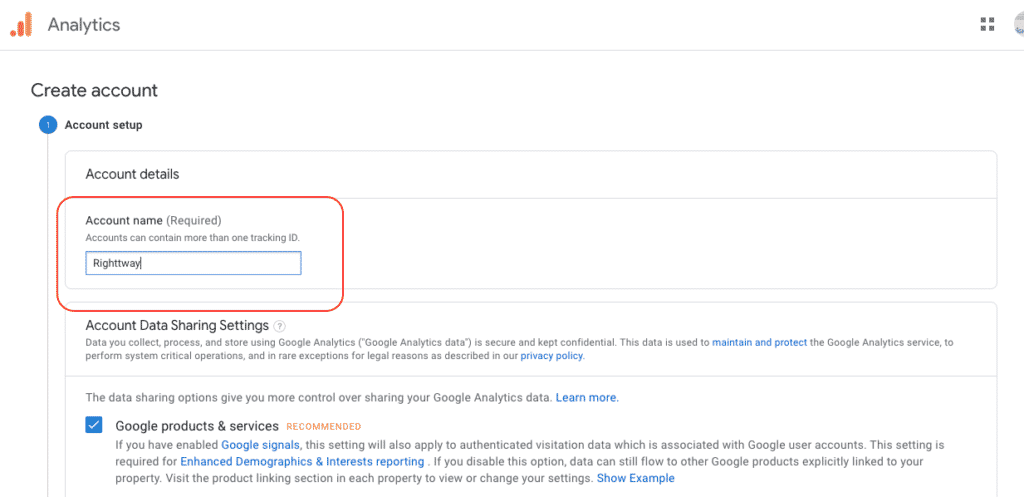
Step 3: Now you need to give your account name, it can be anything. So here for example I gave business name. so you can give yours.
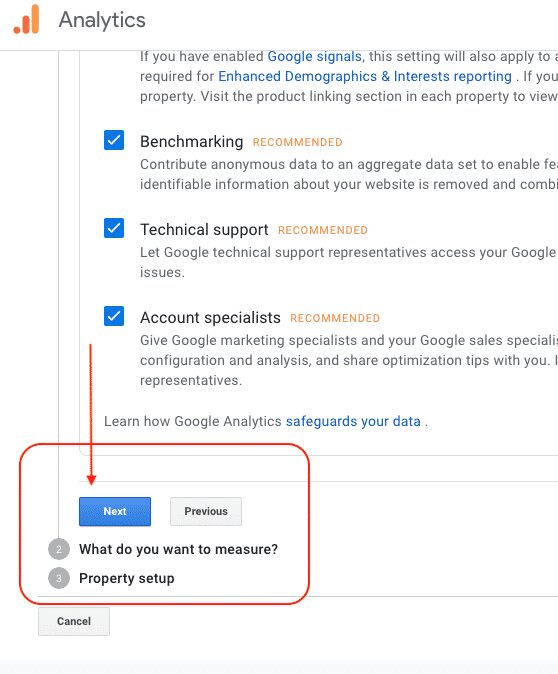
Step 3: It will ask you for the marketing details, check the boxes you needed, and click on next.
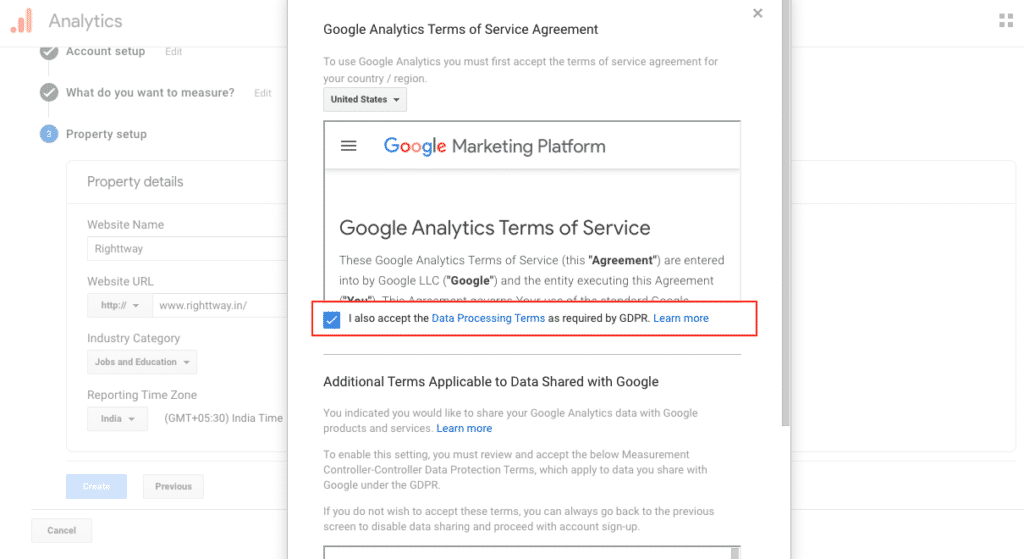
Step 4: Click and accept the agreement and proceed with next.
Step 5: Now you will be redirected to the Dashboard and one which I marked is the Tracking ID and you will need this to Analyse your website traffic via WordPress.
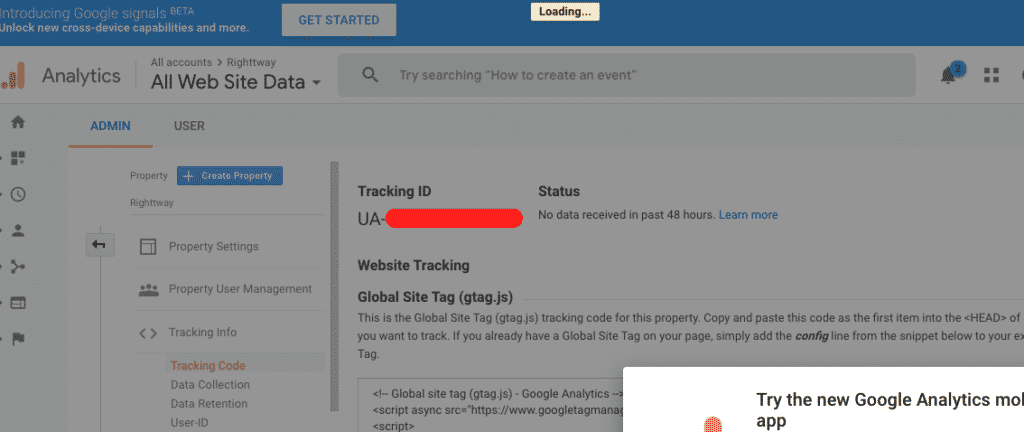
Step 6: A quick view to Dashboard, we will go deep into each on another post, as of now once you set up Google Analytics you will be showing empty later once you come back after integration you can see your metrics.

Step 7: Go to Google Analytics and Install GA Google Analytics, Install and Activate it.

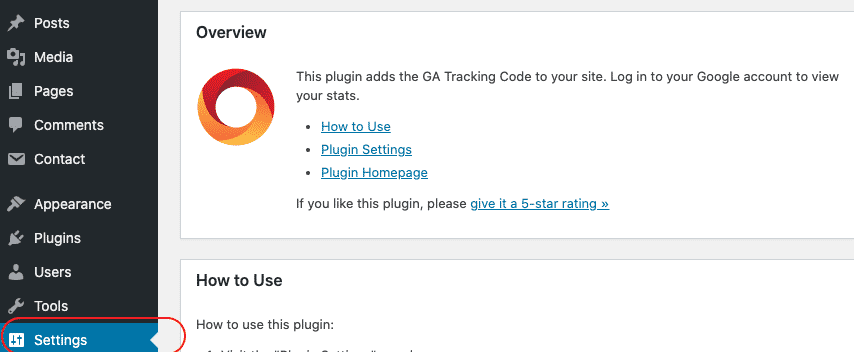
Step 8: Go to your WordPress Dashboard, and go to Plugin settings.
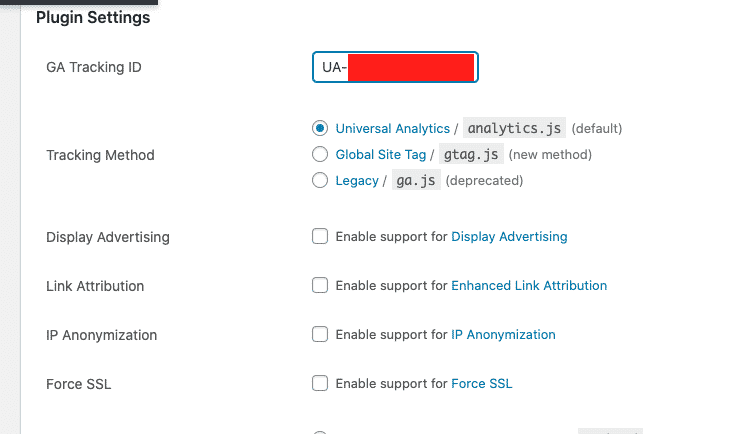
Step 9: Paste your Google Analytics ID over there. That’s all you need to do to set up Google Analytics, no code paste in your HTML page is no more needed.
FINAL VERDICT :
In conclusion, I hope you enjoyed reading this article on “How to create Google Analytics account and integrate with WordPress”, If yes, then don’t forget to spread a word about it. We would love to hear the feedback from your side and if any doubts contact us. Signing off sanjay@recodehive.com


No Comment! Be the first one.