Google Workspace Email Alias Setup
Google Workspace previously know as Gsuite is a platform where you can get business email, and things can be expensive if you are a beginner in the business because buying additional email for the user can cost few dollars. This post will help you to get up to 30 Email alias user IDs for free
Table Of Content
Get the Free Google Workspace Email alias
So what is an Email alias, let’s take a scenario I have created an email alias (support@recodehive.com) if somebody sends me a message to the email alias it will get forwarded to my main account like sanjay@recodehive.com
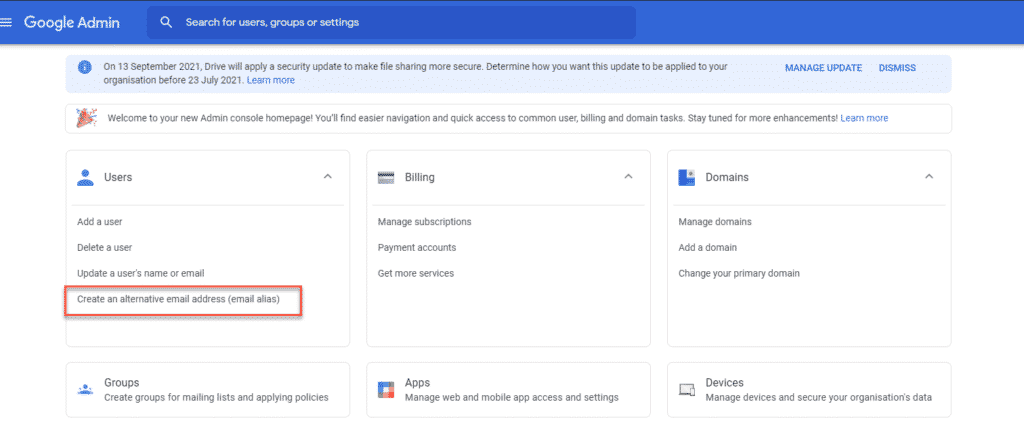
Step 1: You need to have a Google Workspace account and need to Log in to the account. Then click on the Create an alternative email address (email alias) option under the user tabs.

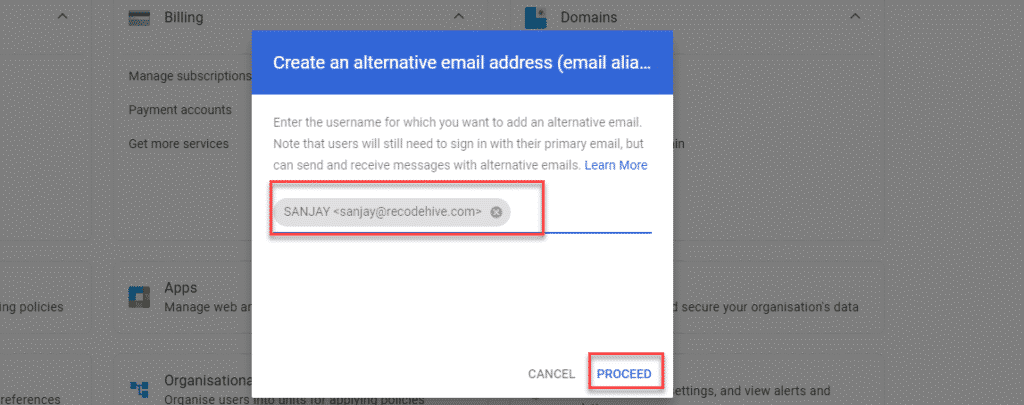
Step 2: This will take you to the below screen where you have to select the existing main user ID from the selection and click on proceed.

Step 3: Enter the Email alias you wanted here, you can enter up to 30 email Alias here. Now if you don’t know what are email alias see the example below.

Example: If sanjay@recodehive.com wants a support email id where users can reach out to sanjay via the product support page, so sanjay can use support@recodehive.com. This way it increases the credibility of the business. Domains like info@recodehive.com etc can be done in the same way. Mail sent to any of the address goes to one account and user have the feature to any of the id and reply.

Some sample emails alias are
- newsletter@recodehive.com
- support@recodehive.com
- sales@recodehive.com
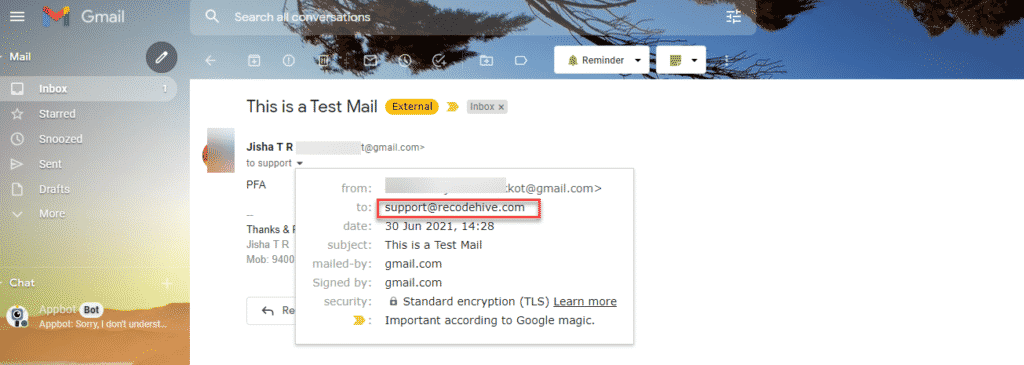
Step 4: Here is the example of an alias email sample sent from the common user ID. A similar way can create 30 Free Email IDs. Now there is another issue while replying, as per the current setup I have received mail to alias mail and when I click on reply mail will trigger from sanjay@recodehive.com which is my main account, and the user will get confused easily.

Reply from Email Alias in Workspace Set up
Step 1: Go to Workspace Email, click on the Settings gear icon, and head to see all settings.

Step 2: Click on Accounts Tab and add the alias email by clicking on Add another Email address.

Step 3: Enter the name and Email Address, it should match with the alias mail, help you to get organized.

Step 4: Now click on reply to the mail received in the name of the alias and click on reply you will be having an option to reply to the mail from alias Mail ID. Cool isn’t it?

FINAL VERDICT :
In conclusion, I hope you enjoyed reading this article on “How to Sync Google Calendar with Outlook”, If that’s the case, don’t forget to tell everyone about it. We’d love to hear from you, and if you have any questions, please don’t hesitate to contact us. Signing off sanjay@recodehive.com


