Set up SAP CPI Trial Account.
Note: Updated as per new SAP CPI Tenant setup UI changes as on 07 May 2021
This is a continuation of setting up an Account in SAP CPI, Kindly refer to the previous post to create an Account, In order to do the full function is SAP CPI you need to set up SAP CPI Trial account. New account trail offers 365 days rather than 30 days.
Step 1: Site Login: you need to log in to the below site to set up a tenant in the SAP CPI Tenant Trial account and enter the trial account as mentioned. Once you enter then a dialog box will pop asking the region to set up the server.
https://cockpit.hanatrial.ondemand.com/cockpit/#/home/trial

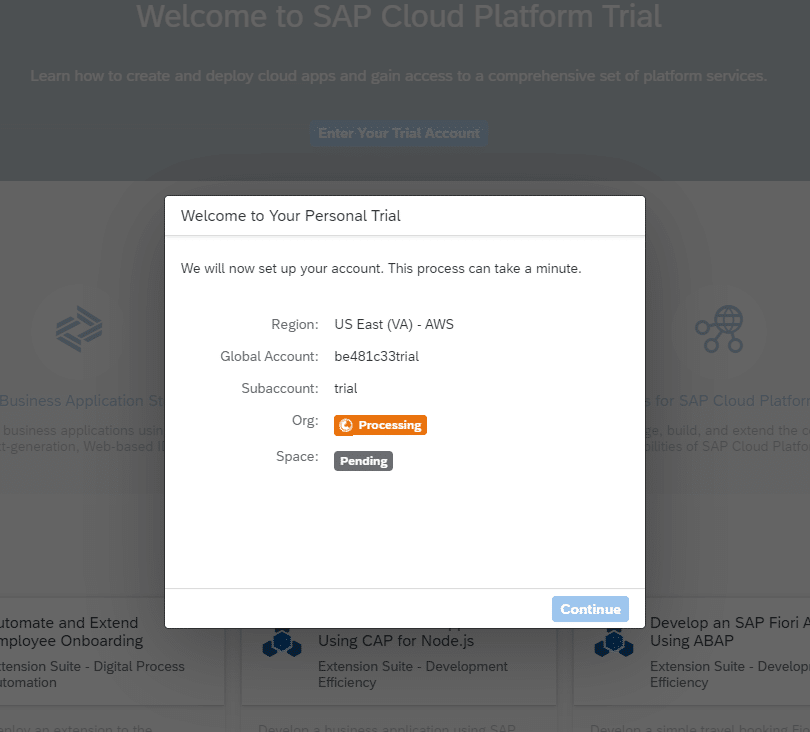
Step 2: Select any of the 2 regions, whichever close to you. I recommend using the US East. Once you click on the region you will get the below set up screen. Once the processing is complete click on Continue on SAP cpi trial.
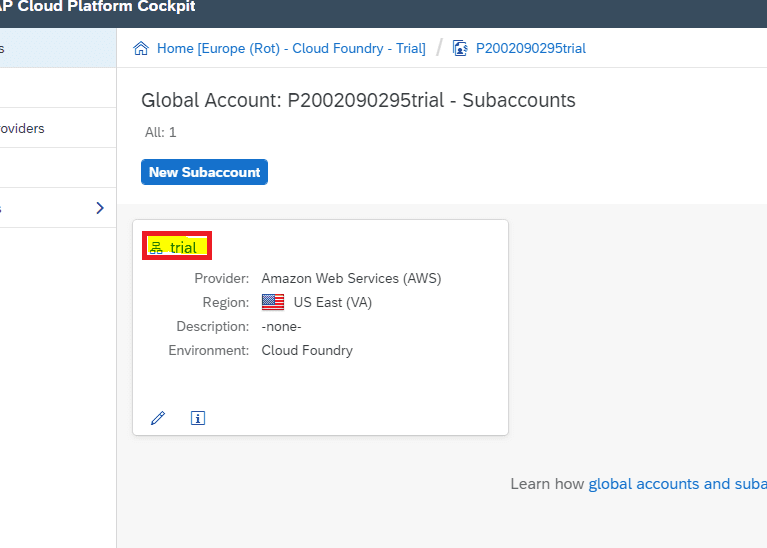
Step 3: Once the processing complete a sub-account called trial has shown below will be created below. to continue set up of SAP CPI tenant click on the trial as shown below.
Step 4: In the next screen you will get a similar screen, if you can see the existing active subscriptions count has 2 or 1 you can jump to step 6
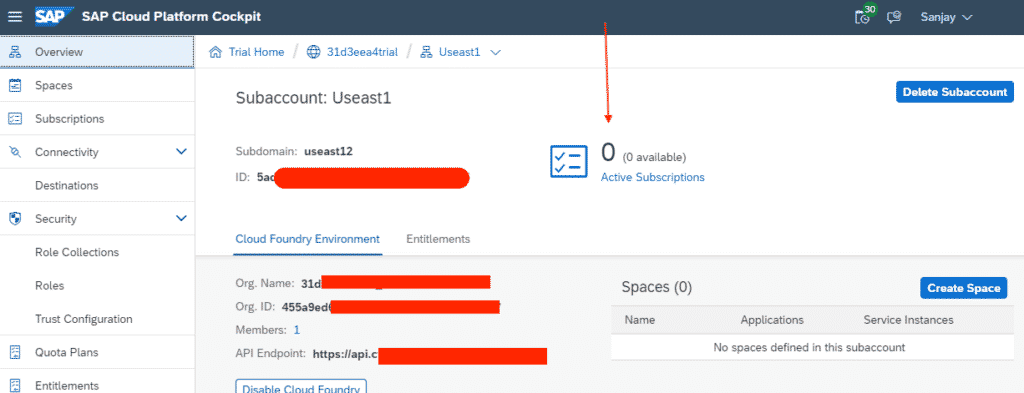
Step 4: If you cant see subscriptions, from the left side click on Subscriptions -> select Process Integration and do subscribe. Mainly the subscription process is done to subscribe to one of the cloud features, here we are going to subscribe to Process Integration.
Step 6: Once you click on subscribe it will come like subscribed, now to go back to the main screen, Click on Trial.
Are you facing any issue here ? like not able to find the subscription?
Click here to fix the issue: Not able to see the Subscriptions
Step 7: Now from the Home screen left tab under security Click Role Connection.
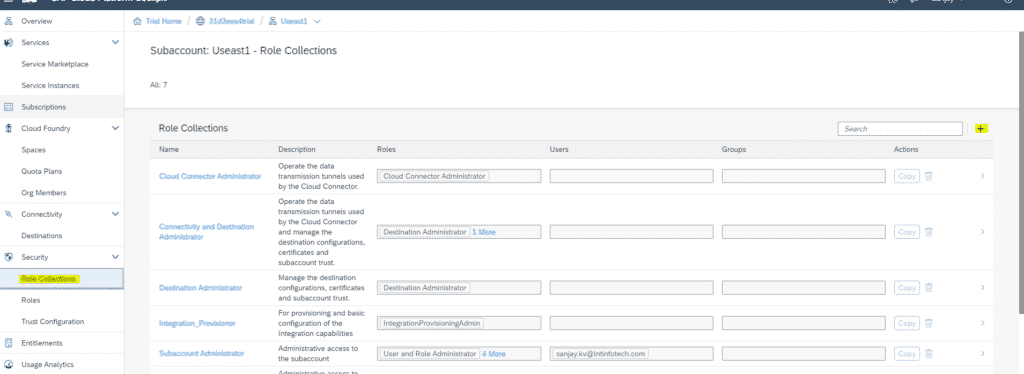
Step 8: In the above picture you can see a + button on the right, click on that add a new Role.
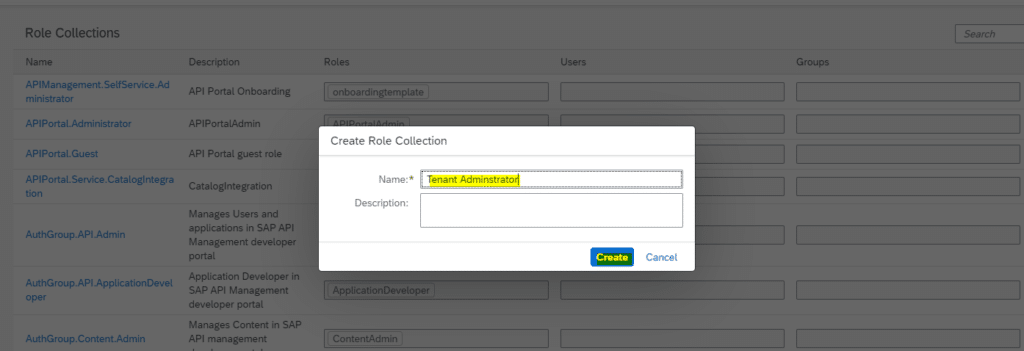
Step 9: Now can enter the name you wish to create the role, it can be anything but you should remember it. it is needed at the end. Type Name and click on Create Button.
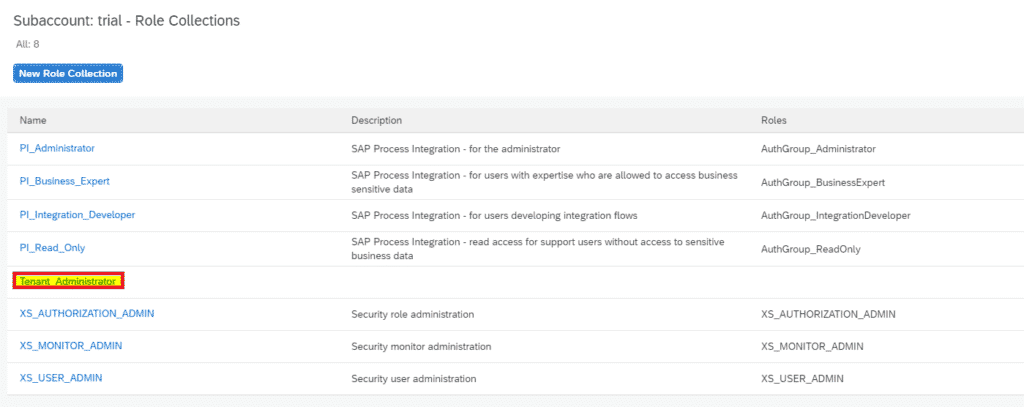
Step 10: You can now find the Role you created in the role collections, Now click on the Role you have created. THIS means I have created an SAP CPI role in the name of Tenant_Administration I have to select that from the list as shown below.
Step 11: Once you click on the role you have created, Now you will get a window like this. Click on the Add role/edit button to add a role.

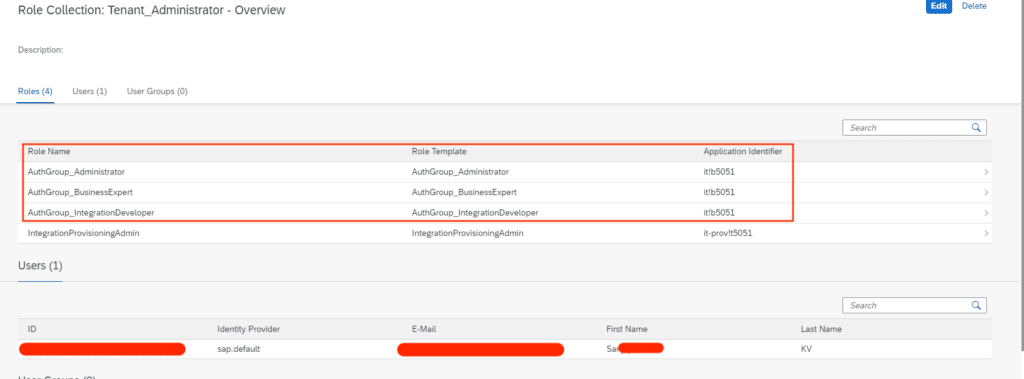
Step 12: Select the Application identifier as shown below, it will be the same as the below but the number can be random and select AuthGroup_Administrator, AuthGroup_BusinessExpert, and AuthGroup_Integration Developer, then Click on Save Button on the right top side. Along with this enter the username and Email ID.
if you don’t see it perfectly fine, refer to the next step.

Step 13: In most of the case, you won’t see this above option to add so what I suggest you select any random roles and continue the step. You can come back again after step 21.
Step 14: Now go back to the Home page by clicking on trial as shown below

Step 15: You will be in the home page of SAP CPI Tenant set up. Navigate to Trust Configuration under security.
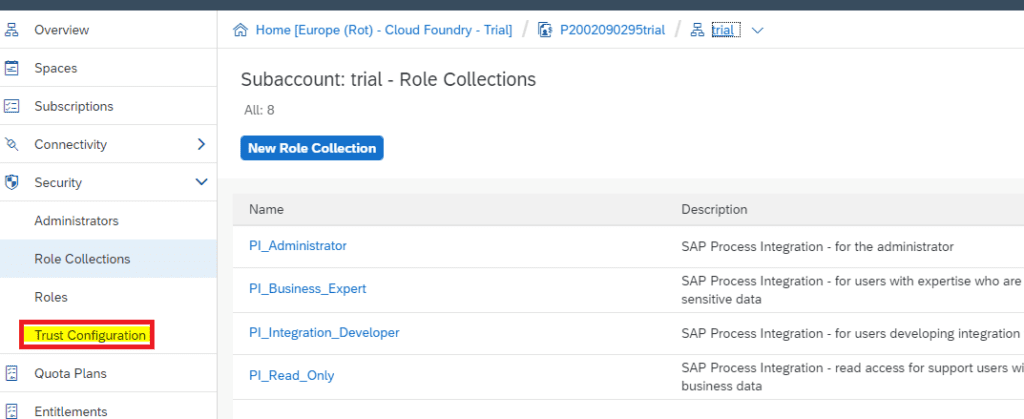
Step 16: Click on SAP ID Service, in some cases the name will be different. click on whatever present there. The SAP ID Service has changed the name to Default Identity provider. Both are the same, Click on that.

Step 17: Enter your Email Address which you registered while setting up the SAP CPI tenant there and click on Show Assignments. You will be able to see all the assignments on that name. Even if you dont see any assignment iit’s eperfectly ine proceed with clicking on Assign Role collection.

Step 18: Click on Assign Role Collection and click on Assign Role Collection in the prompt box.

Step 19: Now again Click here and go back to the subaccount.

Step 20: You will be on the Home page again, Now click on Subscriptions. This subscription name has changed to SAP marketplace.

Step 21: Now you see process integration is enabled, now click on Go to Integration Suite as highlighted. Click on Subscribe. Once you click on Subscribe a Go to Application icon will be active. Click on that .


Step 22: Once you click on Go to Application, on the right top corner you might end up getting a screen like this, we need to add Capabilities here. Please follow the below steps.

Step 23: Click all the checkboxes and click Next, at the end click on Activate.


Step 24: You will get a URL in this screen, this is the URL for Cloud platform Integration after this we will go with creating key creation and service instance.
Note the URL in a Notepad because these urls are important and might require in the future.

Step 25: Now through this URL you can create Integration packages and Integration flows, this URL also can be used for SAP cloud platform Integration Application.
Try to click on the first URL. If you are redirected to a page with Null please Go to Step 9 and add those roles, If you were not able to add them before it will be available now. Make sure the roles select AuthGroup_Administrator, AuthGroup_BusinessExpert, and AuthGroup_Integration Developer. Once you did that proceed with step 26.

Step 26: Click on Service Market place and go to Process Integration Runtime (scroll down to see process integration runtime). on the 3rd you can see Process integration click on that.

Step 27: Now click on create Instance and click on New Instance.

Step 28: Click on Next

Step 29: Click in specify Parameters tab, and enter the below command and click Next .
{
    "roles": [
        "ESBMessaging.send"
    ]
}

Step 30: Enter the instance name and click on Finish.
Step 31: So this is the newly created service instance and click on that.
Step 32: Click on the service key and Create a service Key this key will be useful later.

Step 33: Specify a name for the service key and click on save.

Make sure you click on Update Instance.

Step 34: FINAL STEP. Click on View from the drop-down, you can see the option as shown above. Copy the Client Id and the one below in notepad this might require an authentication key when you connect Post man and SOAP UI.

Step 35: Go to SAP Market Place -> Process Integration -> Go to Applications. Then click on the 1st option has highlighted. Give some time over here, around 1 hr and come back and try to open the Application as shown here.

You will be reaching this screen which is final stage of setting SAP cpi trial account.

Step 36: The process is complete this is the place where you create Integration flows. The SAP CPI Tenant set up is completed now. Please refer to our other Tutorials to build.

SAP CPI Updates 2021
The below is an update of SAP Cloud Platform Integration updates on April 2021. There are few UI changes and name changes and few added features to this integration platform. Watch the SAP updates below.
Final Verdict :
In conclusion, I hope you enjoyed reading this article on “Set up SAP CPI Trial Account, SAP CPI Tutorials”, Note: SAP CPI IDE is constantly updated, so any changes in the screenshot while setting up your CPI trial please let us know through the mail, it will help a lot of people struggling to setup the tenant environment. Signing off sanjay@recodehive.com


