


Table of Contents
Prerequisite:
Before getting started you should have SAP Active Tenant, If you don’t have any active tenant of SAP CPI, Please refer to the previous tutorial and setup the tenant. This Tutorial will give a good idea of SAP CPI Tenant and a glimpse of how to work with Integration Flow.
Getting Started
Step 1: You have to log into the CPI Tenant to get started. Click on the link to proceed. Link
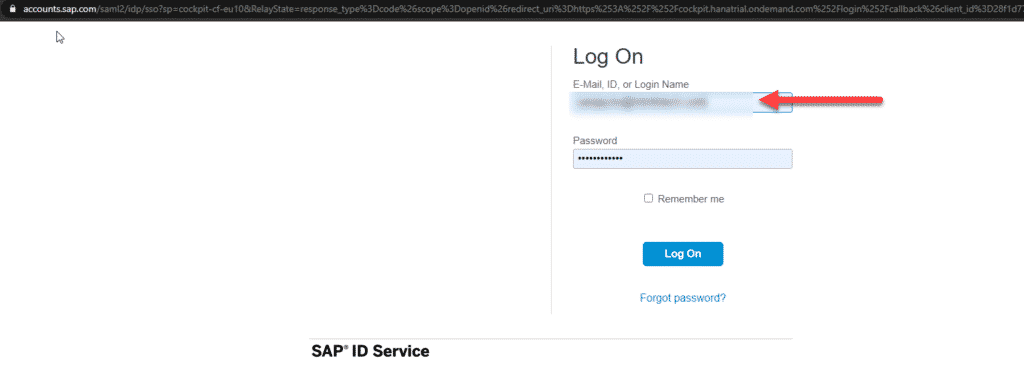
Step 2: Click Enter your trail account to login, This post is targeted for complete beginners, so the steps you may find elaborate.
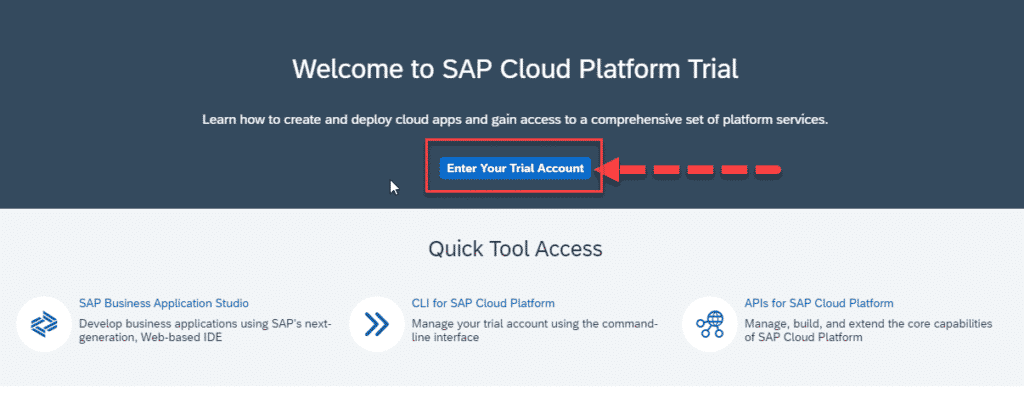
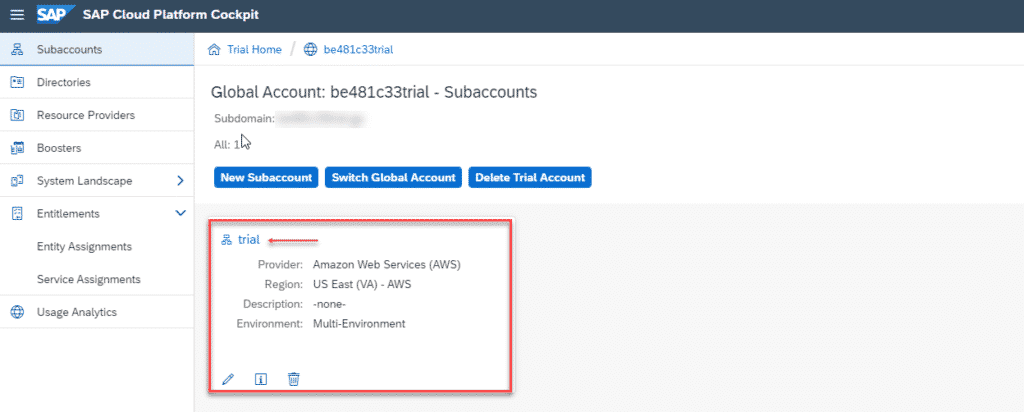
Step 3: Hope you have setup your tenant and created a Sun account, Here i have created a sub account called trial. Click on the similar sub account you have created. Note: Sub account name may different from what you have created.
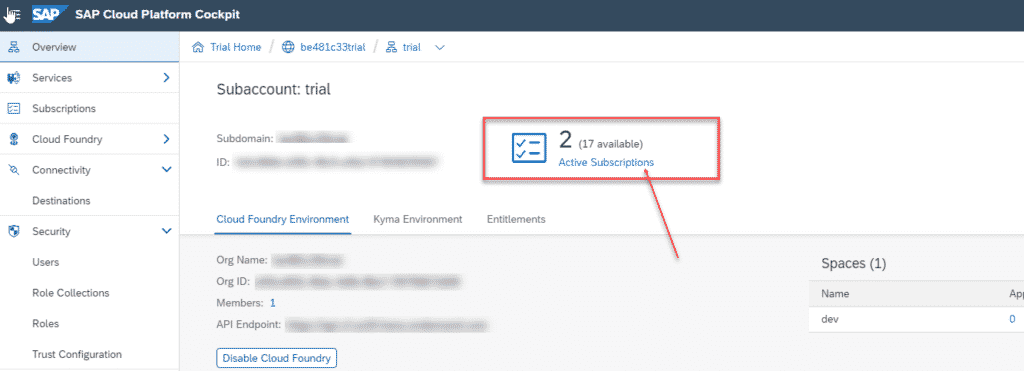
Step 4: Now the next step to got to your integration flow, Once you click on the sub-account which I mentioned above now click on Active Subscriptions, You may find the count as 1 or more according to the CPI subscriptions you have done from the subscription tab before.
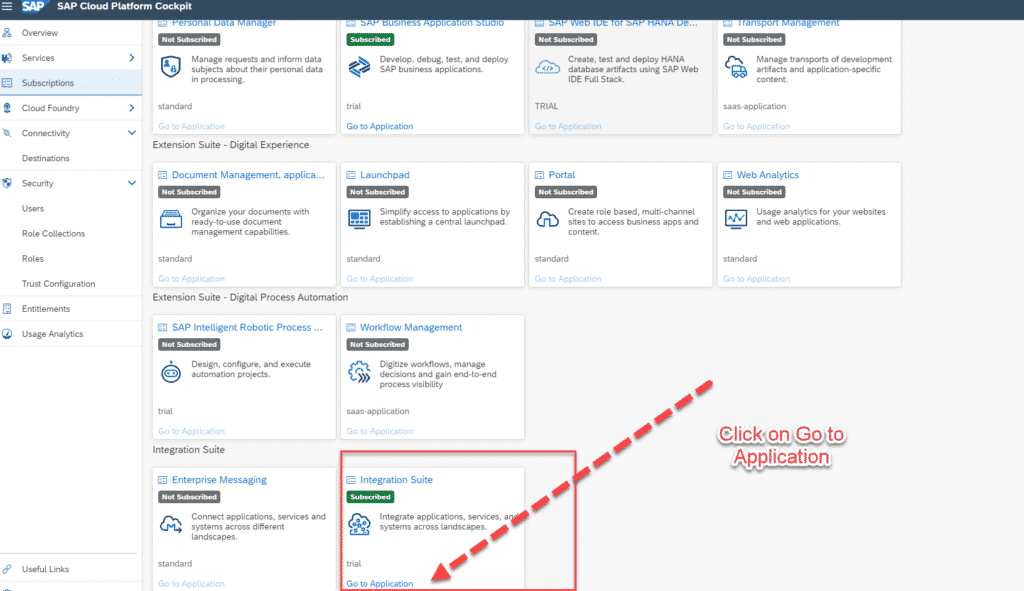
Step 5: Now the list of active and inactive subscriptions will pop up on the screen. Click on Integration Suite from here, below the box you can find Go to Applications. Click on that to proceed further.
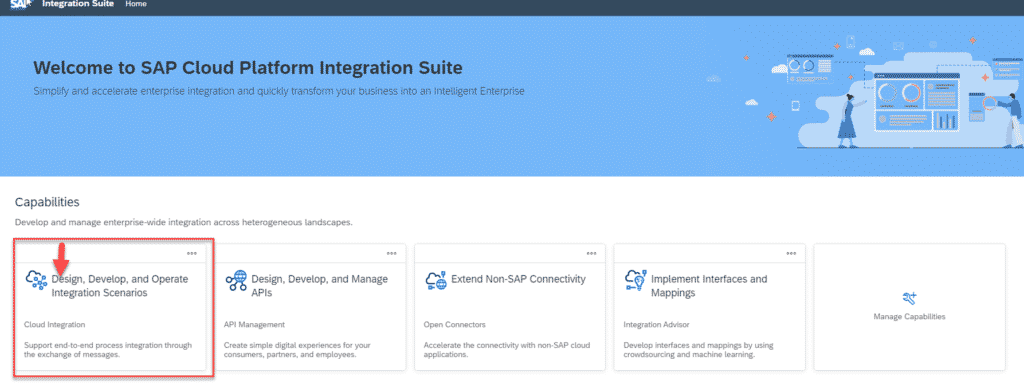
Step 6: Now you are in the integration suite and to proceed to create a new integration flow in CPI click on Design and Develop box as highlighted in the below picture.
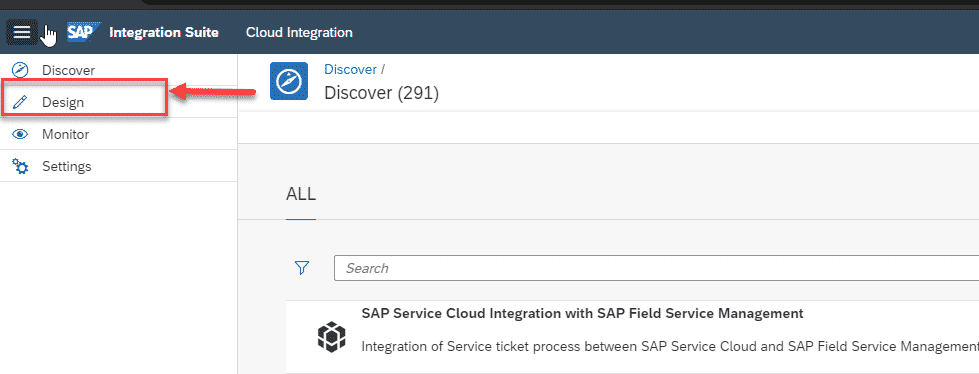
Step 7: Now you are in the cloud integration directoy Once you click on the hamburger you can see 4 subtask.
Discover - You can get predefined template for the SAP Iflow. ~230 IFLOWS available.
Design - This is the place where you design the Integration Flow from the scratch.
Monitor - You can monitor you Iflows here and check their active state/ Trace Logs etc.
Settings- In the real tenant you may not see this without proper roles.
Step 8: You can see here I already tried to set up 2 packages in the name of Trial setup and weather report. To create it from scratch click on Create button on the top right corner of the screen.

Step 9: Give Tenant name and short description here: This is for the developer information, Once you start working on the real time you may find lots of package created with almost simillar names, so package description helps too find the why we have implemented those. Gives developer an headsup.
Once you gave the name and description click on save button.
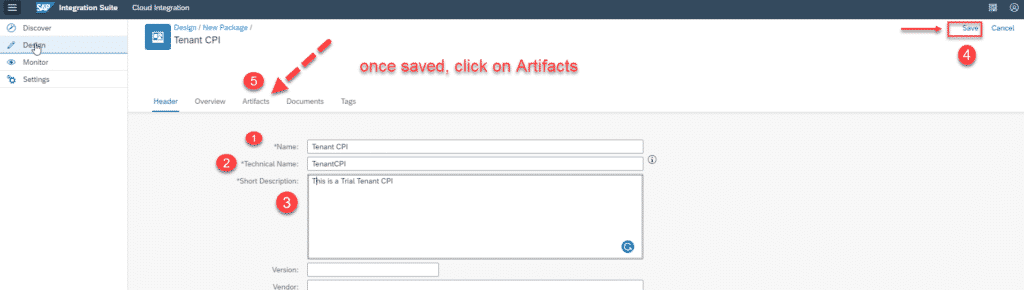
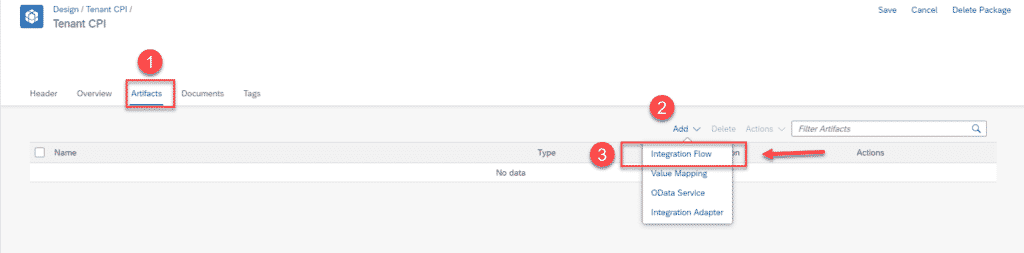
Step 10: Now move to the artifacts window under the add dropdown you can see Integration Flow. You will be having 4 categories under it, we have already explained this in the blog post each of them like how to create value mapping using SAP CPI. Now click on Integration flow.
Step 11: In the next screen you will get summary of the development you are going to do, cross check it once everything is as per your requirment clcik on okay button.
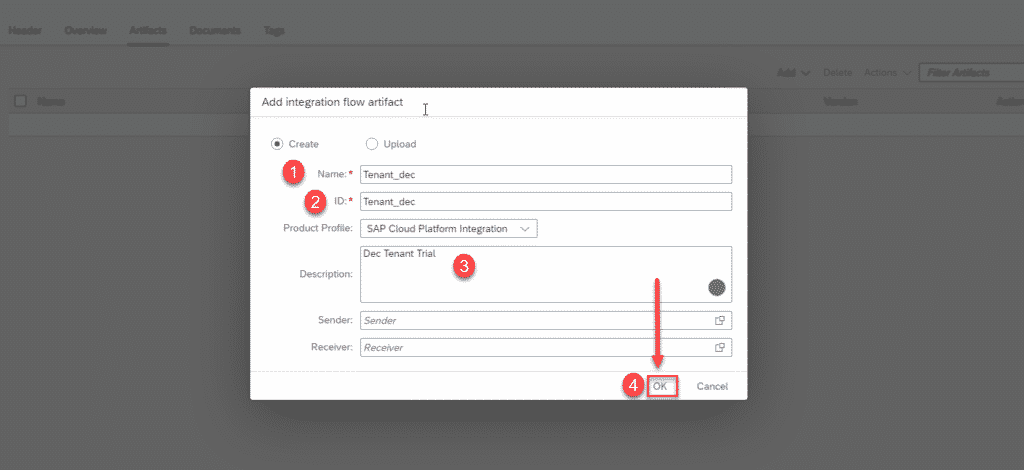
Step 12: Click on save. Now you can see the artifact has created.
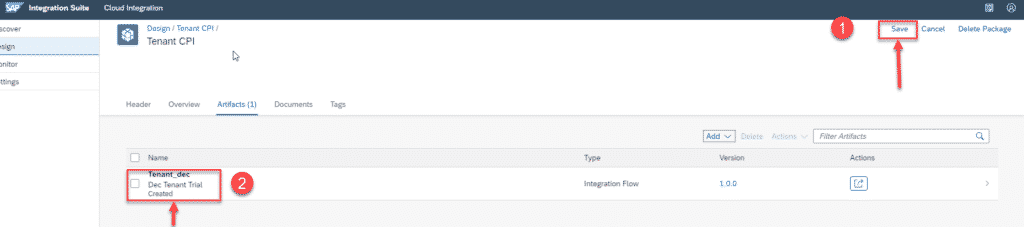
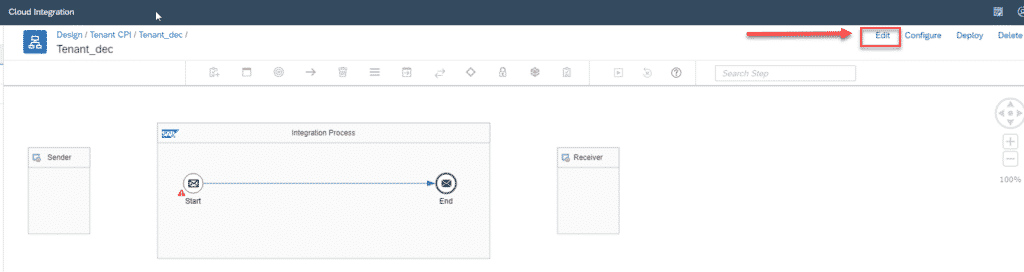
Step 13: Now lets deep dive into the functionalties and developing integration Flow. Once you click on the package highligted in the snapshot above you get your defalut iflow view. Click on Edit to customise or develop a flow from the scratch as per your requirement.
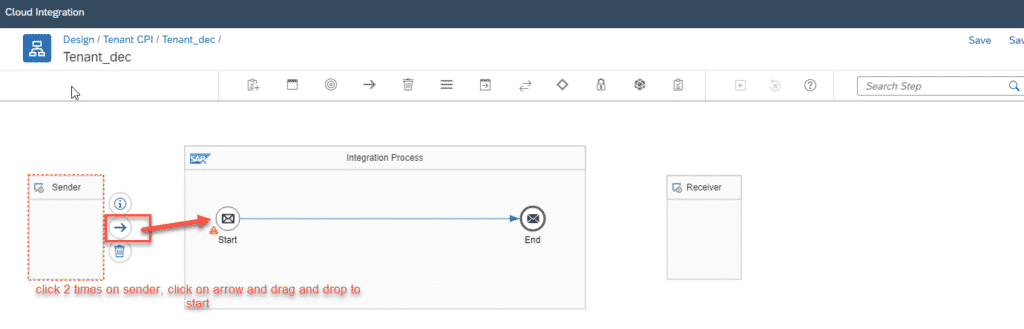
We are going to connect with HTTPS Adapter &Designing a simple flow to do JSON to XML Conversion.
To make the connection click on the arrow marrked and drag and drop to the start. A Pop will ask you to select which connection you want to make, like ODATA, ODATA v2 etc.
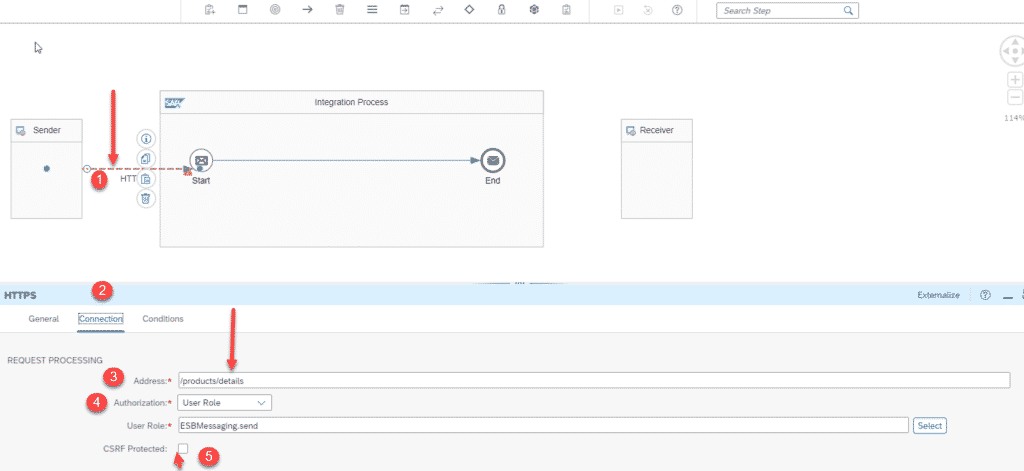
Step 14: Once you select your connector itt will be show like this below. Here selcted HTTPS connection. To specify more connection details click on the link as highlighted and specify the connection details as per the attached image 2.
Step 15: Now we want to convert the JSON input to XML output so we can go with the standard JSON to XML converter provided by SAP. For this click on the Transformation, icon click on the converter, and JSON to XML converter.
Message Transformers > converter > Json to XML converter
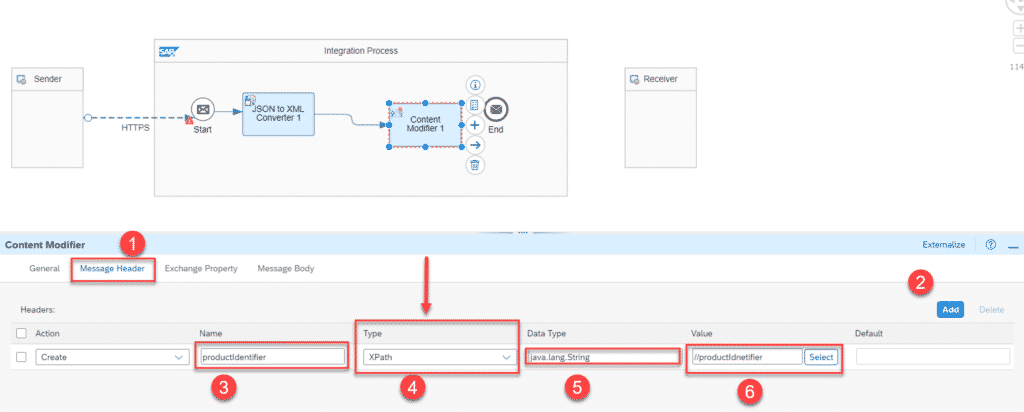
Step 16: Adding Content Modifier, Same like from Transformation icon click on content modifier then drag and drop to the line as shown below. You can learn more about the content modifier here.
Step 17: Now you need to specify what modification you need to do. Click on the Content modifer 1 and click on the message Header tab. You can add the Headers like shown here.
Step 18: Now you to create a request-reply, click on the call icon and create an external call, and drag and drop as shown below.

Step 19: Connecting Request reply to receiver, You just need to drag and drop to the receiver for the connection and specify the connection type here I’m going with ODATA v2.
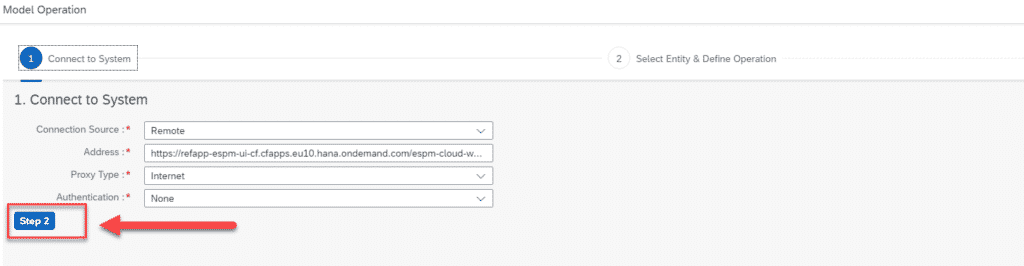
Step 20: If you are using ODATA similar to the connection we specified for HTTP we need to specify in connection tab.
https://refapp-espm-ui-cf.cfapps.eu10.hana.ondemand.com/espm-cloud-web/espm.svc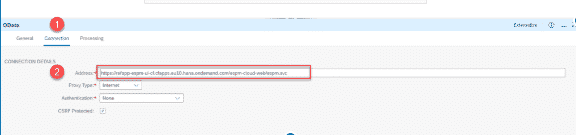
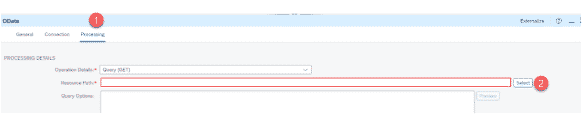
Step 21: In the ODATA connection settings you have to specify these things as per the requirement. Just a reminder this post aims to give some idea about the things that get done in CPI, not an end-to-end application tutorial.
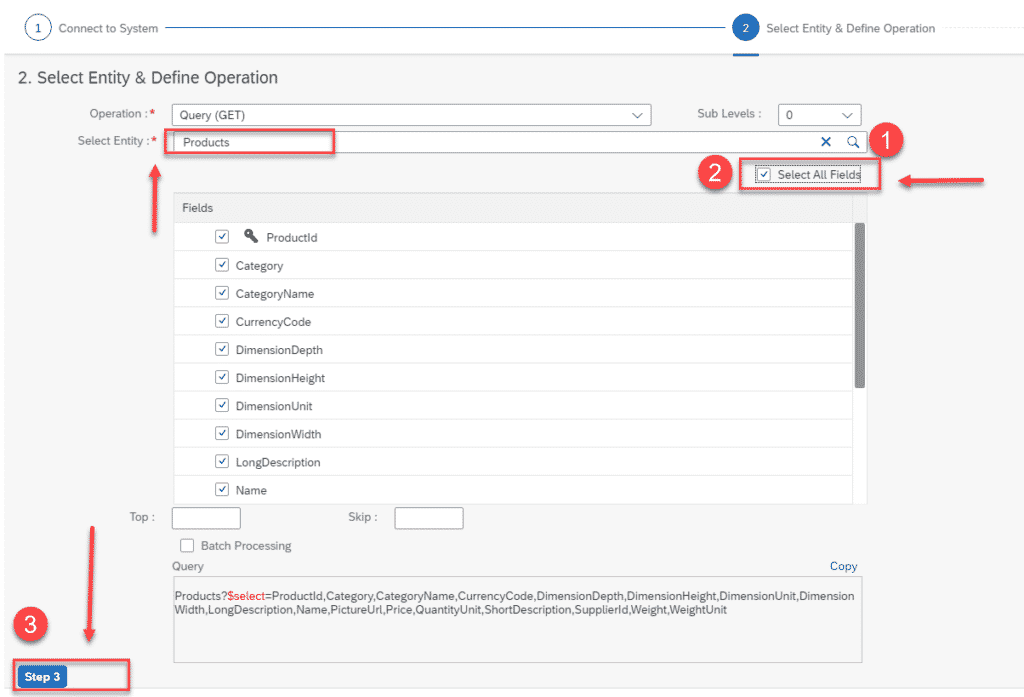
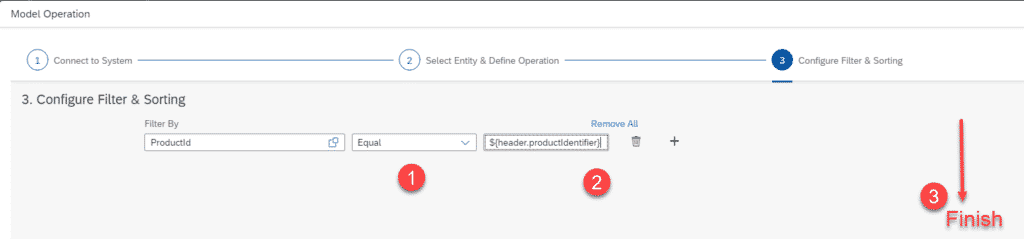
Step 22: In the third tab configure Filter & sorting clickon filter by and select the Product ID which we specified in the content modifier. Then click on okay.

sds ${header.productIdentifier}
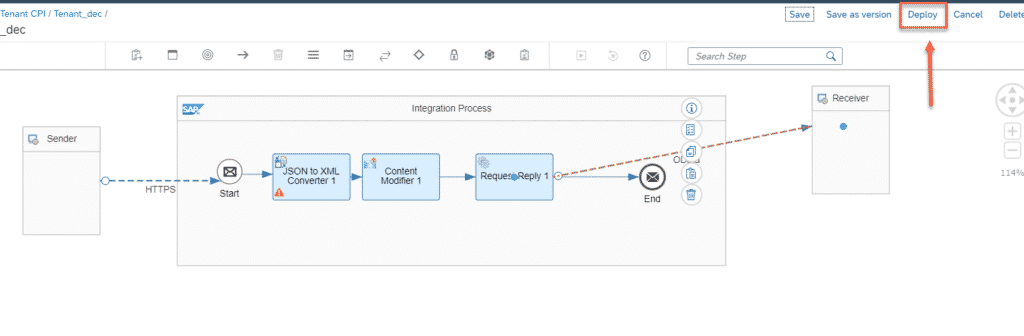
Step 23: save and deploy the integration flow.
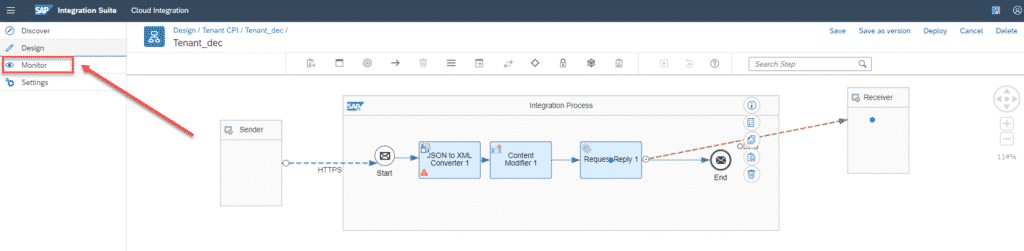
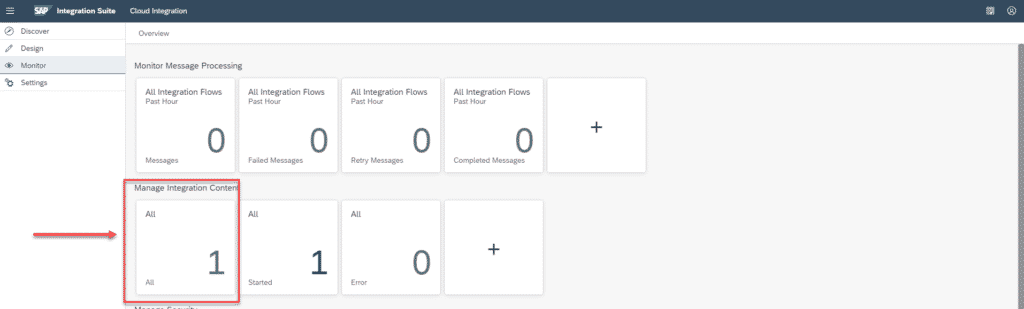
Step 24: Once you deploy the application you can go to monitor and see the Message processing whether its in queue, Error or processed.
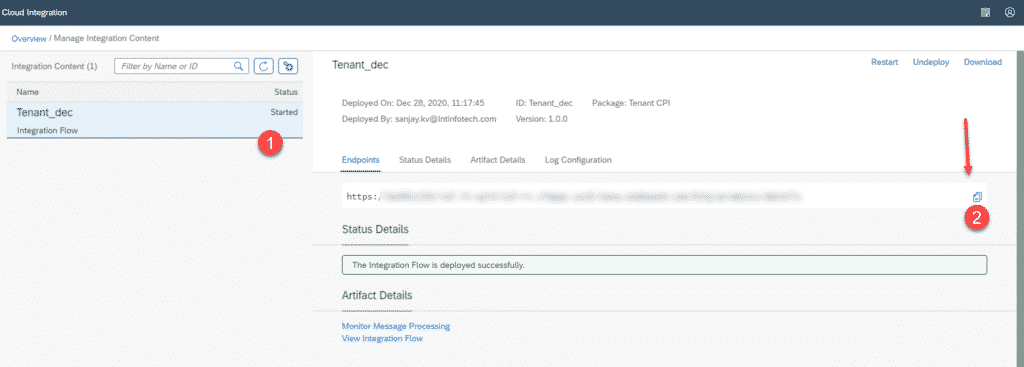
Step 25: Click on the cell i Highlighted. This will give us the end points of this map.
Step 26 : Copy this end point URL and in Testing using any webservice this might needed.
Final Verdict :
In conclusion, I hope you enjoyed reading this article on “Start with SAP CPI Integration Flow: Beginner Tutorial”, Thanks for reading the blog. Signing off sanjay@recodehive.com