


Table of Contents
Is Latex Commands Easy to Learn?
Latex commands are really easy to learn and implement almost like writing English, the good part is that the setup and technical documents are readily available for any beginners to learn the process. The installation of the Latex software is explained in the previous post. Have a reference here.
Once you installed the software and create a Latex file and save it the extension will be in .tex format. Let’s look at the most useful and frequent commands in Latex. Once you write the below commands in MiKTeX Latex editor use crtl+T to run the Latex compilation.
How to Comment in the Latex Editor
To comment a line use % key for the purpose. Usage of \ tells that it’s not texted to print it will be taken care of by the latex compiler as the command and \\ for a line break.
%----------------------------------------------------------------------------------------
%	Main Page PAGE
%----------------------------------------------------------------------------------------
% for comment to
\break   to put line break
\{commandname{option}
How to start with Latex Editor
Before going ahead and type the body, the user has to set the document class, usually its set to article for paper documents. This sets the layout as article these sets are called document classes.
\documentclass{article}Whatever goes to the body should define after the document class and it will be input as shown below after defining the documents.
\documentclass{article}
\begin{document}
	Hello World!
\end{document}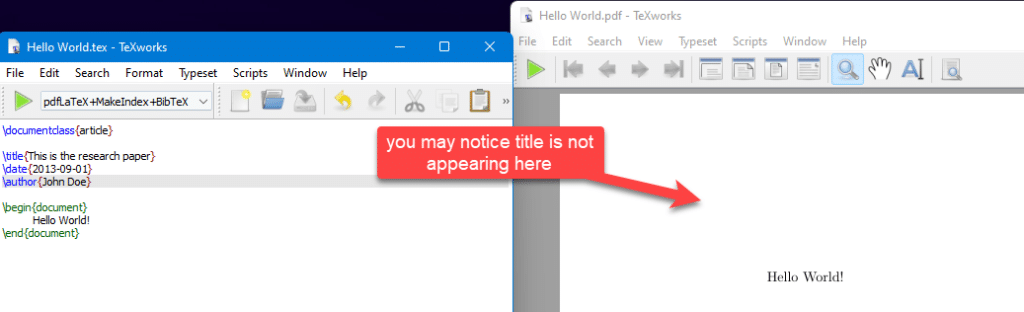
How to add Title in Latex
The title will be defined as mentioned above right after the document class. Similar goes for defining the author and date of publishing. This is the very important standard followed in writing the documents in Latex. So the other user referring to your latex editor will get to know who is working on it who are all the authors and the date of the last update.
\title{My first document}
\date{2013-09-01}
\author{John Doe}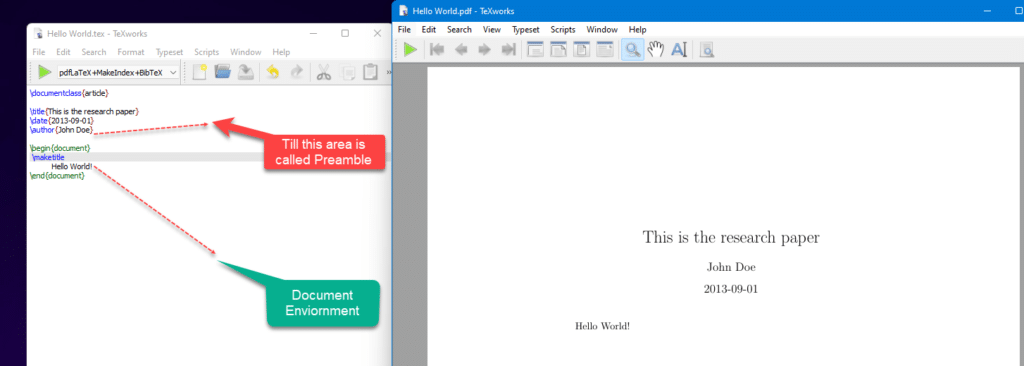
\maketitle brings the heading to the document environment.
Modifying the Section & Numbering in Latex
You can define the sections using \section and define a new page in the similar way \pagenumbering{specify-type}, Type can be without numbers, Arabic, and roman.
\pagenumbering{gobble}
 \newpage
  \pagenumbering{arabic}
Hello World!- gobble – no numbers
- arabic – arabic numbers
- roman – roman numbers

Sections help to segregate the info accordingly, These sections will appear in the table of contents as well. The sample code of the above representation is given below.
\documentclass{article}

\title{This is the research paper}
\date{2013-09-01}
\author{John Doe}

\begin{document}
 \maketitle
\pagenumbering{gobble}
 \newpage
  \pagenumbering{arabic}
	Hello World!

\section{Section Heading}
This is frist subsection

\subsection{Subsection Heading}

Here goes the subsection


\end{document}
Creating paragraph in Latex Editor
The command \newpage helps to create a new page and if you want to start the new page content with the paragraph can use \paragraph{} which brings paragraph and followed by \subparagraph{} starting of sub-para \end{document} which will eventually stop the document. Any further details enter below the end document won’t be displayed on the Latex page.
\newpage
\paragraph{}
Here starts new paragraph
\subparagraph{}
starting of sub para
\end{document}
Adding pictures to Latex
\usepackage{graphicx}
%...
\begin{figure}[h!]
%...
Adding graphics is an integral part of any report to make it easy to understand what you try to explain. Adding pictures and formating may sound complex at the beginning but these are very straightforward procedures. A user has to use this package graphics for the same.
A picture can be added by \beign{figure} command, \includegraphics{pic.png} will help you to insert the picture you want to display. Make sure the picture is there in the same folder where you try to edit the Latex Document.
\documentclass{article}
\usepackage{graphicx}
\title{This is the research paper}
\date{2021-09-01}
\author{sanjay}
\begin{document}
\maketitle
\pagenumbering{gobble}
\newpage
\pagenumbering{arabic}
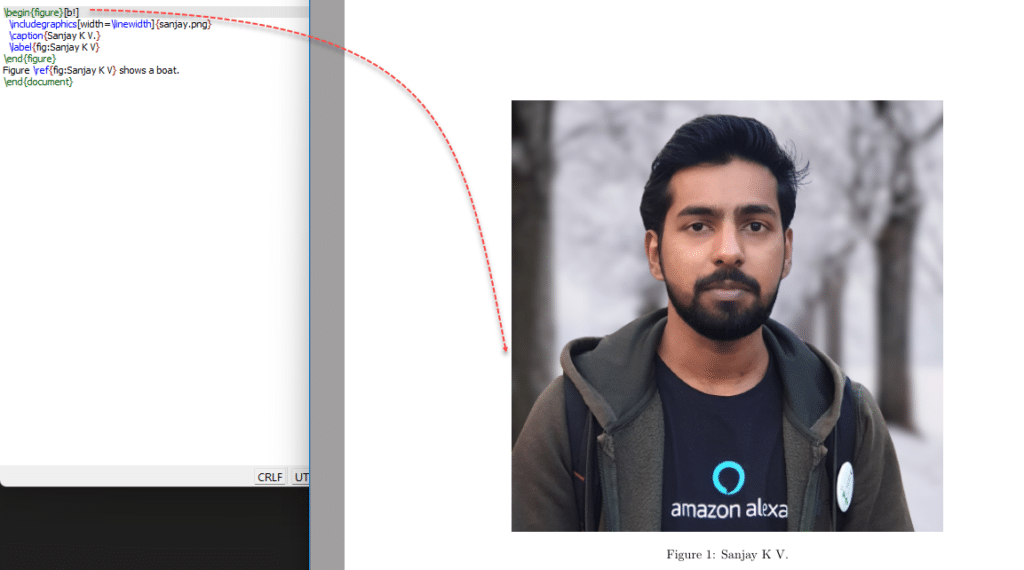
\begin{figure}
\includegraphics[width=\linewidth]{sanjay.png}
\caption{Sanjay K V.}
\label{fig:Sanjay K V}
\end{figure}
Figure \ref{fig:Sanjay K V} shows a boat.
\end{document}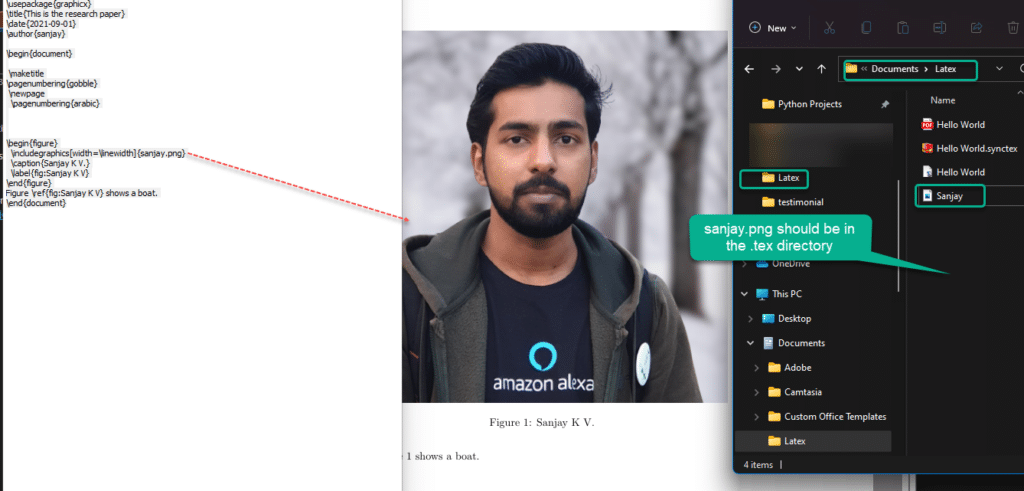
Further customization to the picture can be added by using the label, caption. The below commands can be used to fix the position of your image in the document.
- h (here) – same location
- t (top) – top of page
- b (bottom) – bottom of page
- p (page) – on an extra page
- ! (override) – will force the specified location
How to add Multiple images/subfigures to Latex
Sub Figure can be used to plot the image like below. linewidth represents the space between that image horizontally. \begin{subfigure}[b]{0.4\linewidth} This should be done before including the image as shown below.

\documentclass{article}
\usepackage{graphicx}
\usepackage{subcaption}
\title{This is the research paper}
\date{2021-09-01}
\author{sanjay}

\begin{document}

 \maketitle
\pagenumbering{gobble}
 \newpage
  \pagenumbering{arabic}


\begin{figure}
  \centering
  \begin{subfigure}[b]{0.4\linewidth}
    \includegraphics[width=\linewidth]{sanjay.png}
    \caption{Sanjay.}
  \end{subfigure}
  \begin{subfigure}[b]{0.4\linewidth}
    \includegraphics[width=\linewidth]{sanjay.png}
    \caption{Sanjay again.}
  \end{subfigure}
  \caption{The picture of sanjay. Two times.}
  \label{fig:Sanjay}
\end{figure}
\end{document}
Adding Table of contents in Latex
Table of content is another integral part of making the documentation. using section and subsection, This can be implemented by using \tableofcontents. And further topics can be included with \subsection.
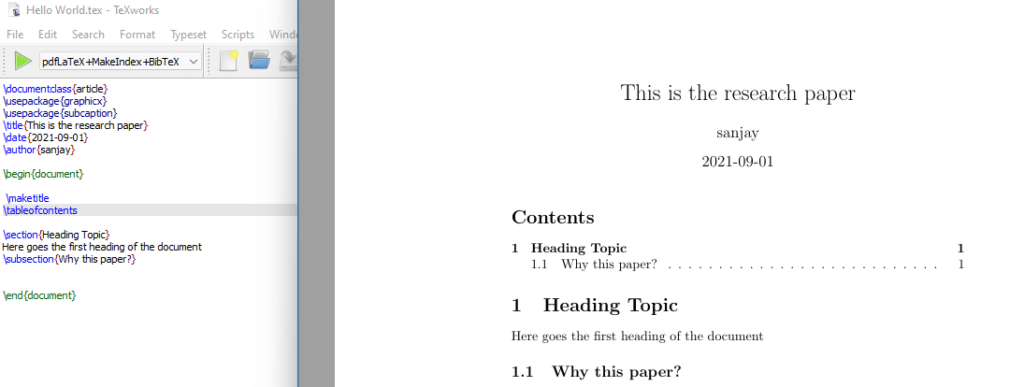
\tableofcontents

\section{Heading Topic}
Here goes the first heading of the document
\subsection{Why this paper?}\subsubsection{Subsubsection} can add this to create more subsection
\documentclass{article}
\usepackage{setspace}
\title{This is the research paper}
\date{2021-09-01}
\author{sanjay}

\begin{document}

 \maketitle
\doublespacing
\tableofcontents

\section{Heading Topic}
Here goes the first heading of the document

\subsection{Why this paper?}


\end{document}
Generating the Bibliography using Latex
.bib file will have full details about the Project a sample is given below.
@BOOK{DUMMY:1,
AUTHOR="John Doe",
TITLE="The Book without Title",
PUBLISHER="Dummy Publisher",
YEAR="2100",
}
You can use the BibTeX generator from google, to create a BibTex from google rather than typing.

How to add Codes to Latex
Adding Coding is a bit tricky you have to be careful when inserting the code and there is a lot of package dependency as you see below. Before you insert a code you need to install the package listed below like listing and color to differentiate your code from the document.
\usepackage{listings}
\usepackage{color}
\renewcommand\lstlistingname{Quelltext} % Change language of section name
\lstset{ % General setup for the package
    language=Perl,
    basicstyle=\small\sffamily,
    numbers=left,
     numberstyle=\tiny,
    frame=tb,
    tabsize=4,
    columns=fixed,
    showstringspaces=false,
    showtabs=false,
    keepspaces,
    commentstyle=\color{red},
    keywordstyle=\color{blue}
}
%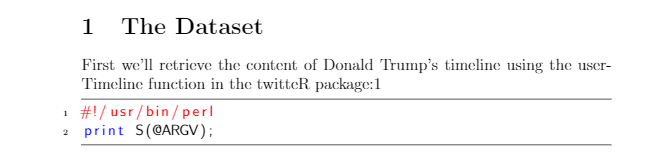
\lstinputlisting{script.pl}
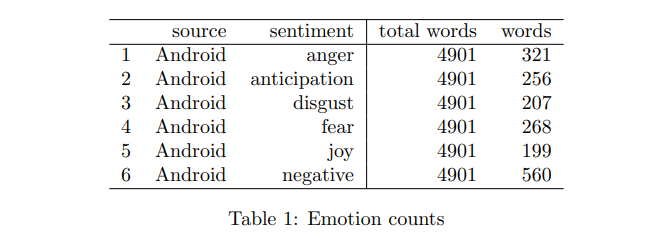
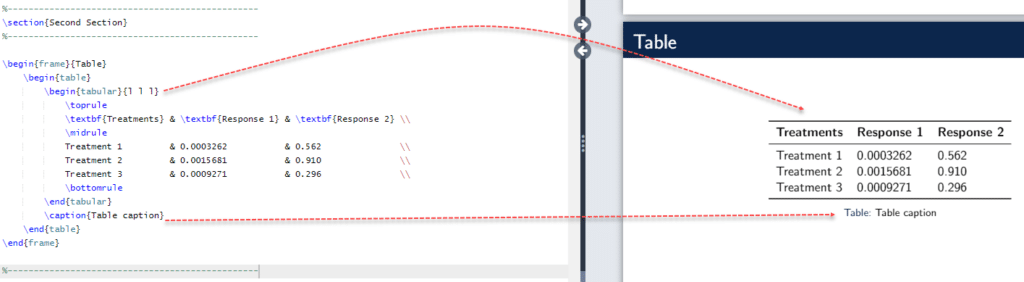
How to create Table in Latex
Now let’s look at how the table looks like in LAtex, like other sample tables inserting doesn’t require any kind of package installation. hline will help to draw the horizontal line, each table will be started by begin \{table} command
%------------------------------------------------

  \begin{table}[h!]
  \begin{center}
    \caption{Emotion Counts.}
    \label{tab:table1}
    \begin{tabular}{o\l|c|r|u} % <-- Alignments: 1st column left, 2nd middle and 3rd right, with vertical lines in between
      \textbf{ } & \textbf{Source} & \textbf{sentiment} & \textbf{total words} & \textbf{words}\\

      \hline
      1 & Android & anger & 4901 & 321 \\
      2 & Android & anticipation & 4901 & 256\\
      3 & Android & disgust & 4901 & 207\\
      3 & Android & fear & 4901 & 268\\
      3 & Android & joy & 4901 & 199\\
      3 & Android & negative & 4901 & 560\\
    \end{tabular}
  \end{center}
\end{table}

  %----------------------------------------------------------------------------------------
Another sample code is given below.
How to add Hyperlinks in Latex Format
For hyperlinks inserting the package, hyperref is important and define the content by typing(here is the content)[here goes the link]
\usepackage{hyperref}
FINAL VERDICT :
In conclusion, I hope you enjoyed reading this article on “A Beginner’s Guide to LATEX – Basic Commands” Let us know in case you find any issues in executing the above steps. Signing off Sanjay Kv