


Table of Contents
INTRODUCTION
The article aims at demonstrating how an incoming header can be retained and used in any integration flow. In this particular demo, I have retained the incoming header named ID and used the header to dynamically route the message via different routes based on its value. One of the route includes calling an local integration process.
CREATING ARTIFACT
Step 1 : Create an Artifact

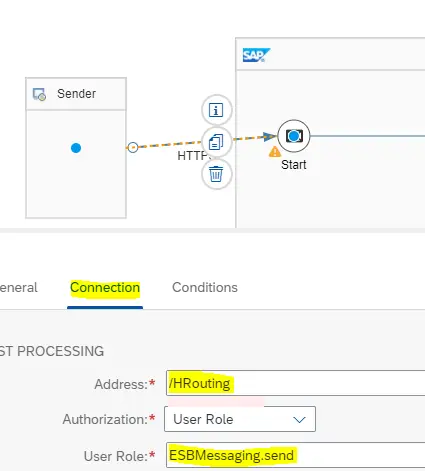
Step 2 : Open the artifact in edit mode. Connect Sender to start Message. From the Pop up, Choose HTTPS adapter. In Connection tab, give any relative address ( /HRouting ). Keep rest settings untouched.
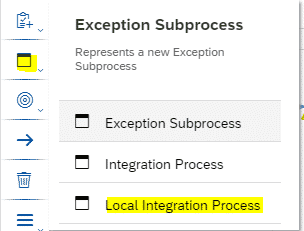
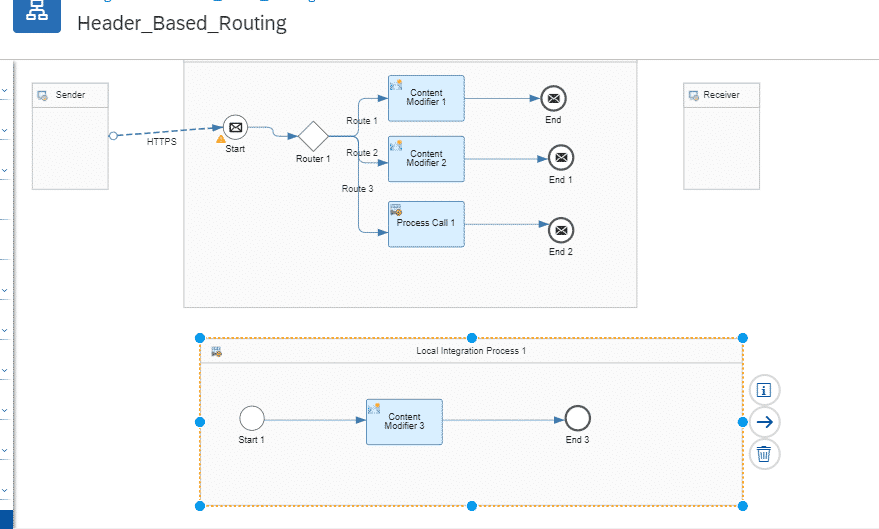
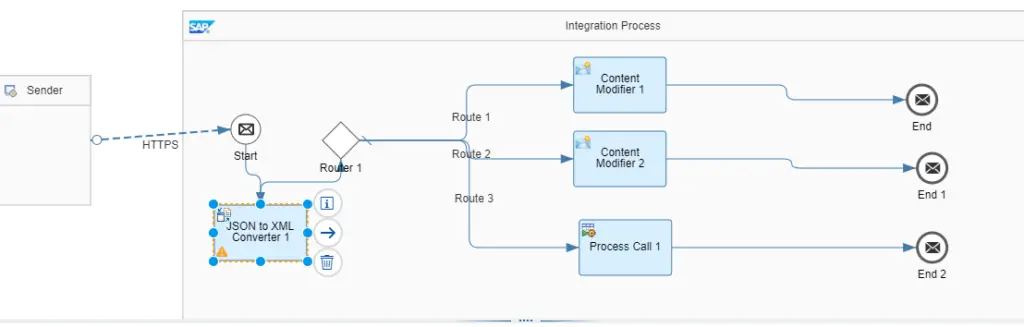
Step 3 : Add a Local Integration Process. This is done just to demonstrate how it can be called.
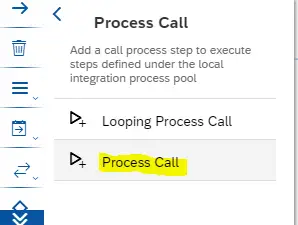
Step 4 : Get a local Process call to call the Local Integration Process.
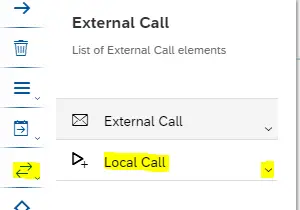
Step 5 : Collect the various Blocks required from Pallet and arrange as shown in the figure.
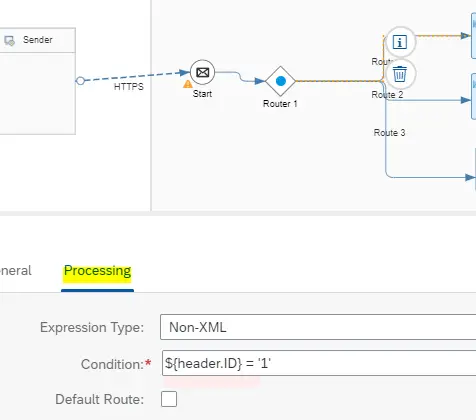
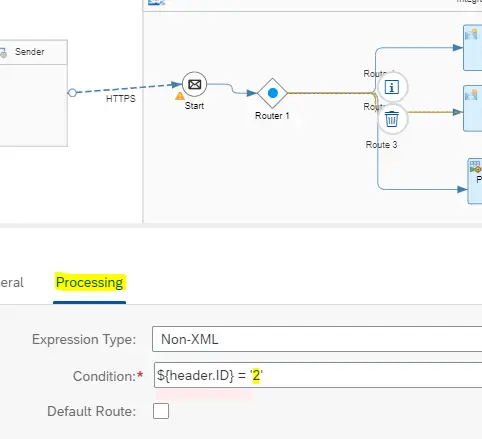
Step 6 : Select Route1. In Processing tab, Select Non-XML .
Condition : ${header.ID} = ‘1’
This Route will be taken if the incoming Message Header has ID=1.
Step 7 : Select Route2. In Processing tab, Select Non-XML .
Condition : ${header.ID} = ‘2’
This Route will be taken if the incoming Message Header has ID=2.
Step 8 : Select Route3. In processing tab, Check the Default route button so that, the message picks this route if ID in header is any value other than 1 and 2 or id ID is not present.

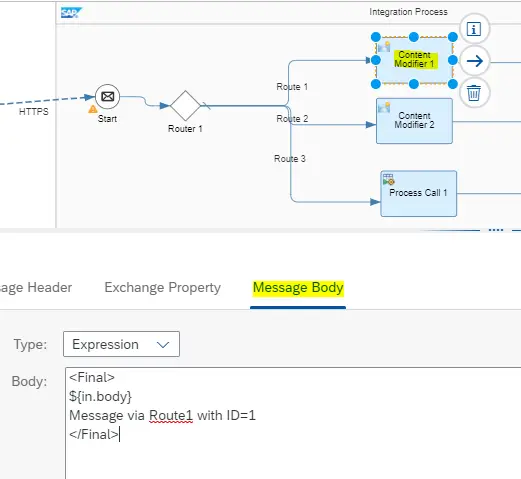
Step 9 : Select Content Modifier in Route1. In Message Body tab,
Type : Expression
Body :
<Final>
${in.body}
Message via Route1 with ID=1
</Final>
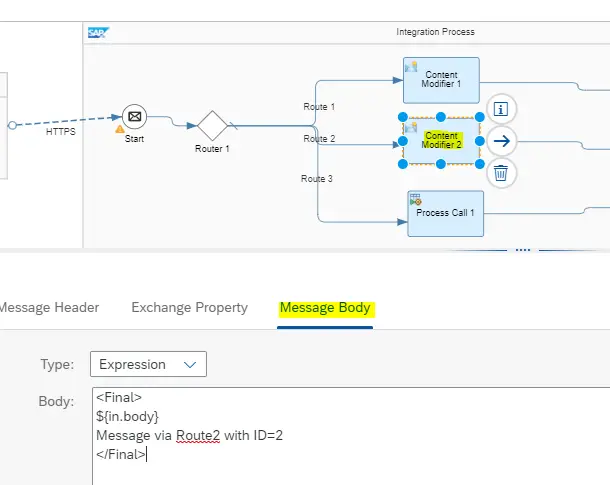
Step 10 : Select Content Modifier in Route2. In Message Body tab,
Type : Expression
Body :
<Final>
${in.body}
Message via Route2 with ID=2
</Final>
Step 11 : Select Process Call 1. In Processing tab, Click on Select button.
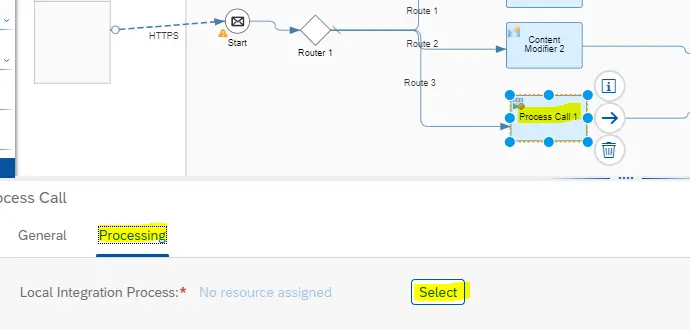
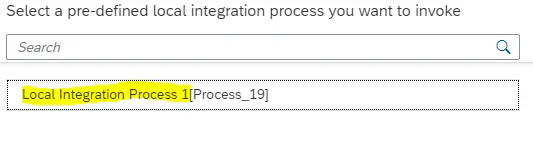
Step 12 : It will list the available Local integration Process. Select the one.
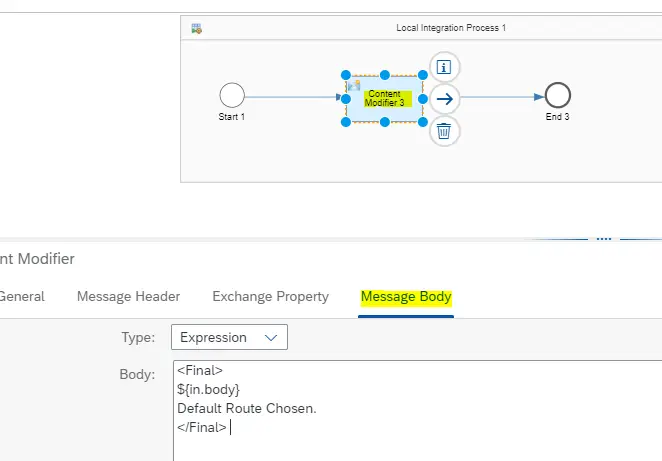
Step 13 : Select the Content Modifier inside the Local Integration Process.
Type : Expression
Body :
<Final>
${in.body}
Default Route Chosen.
</Final>
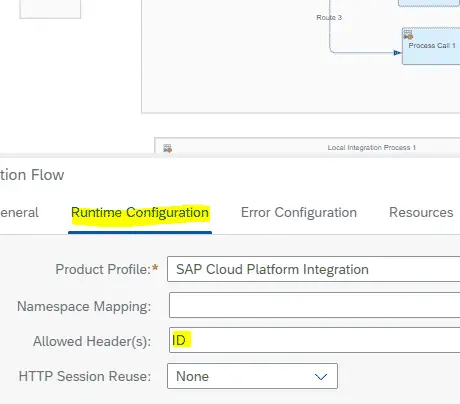
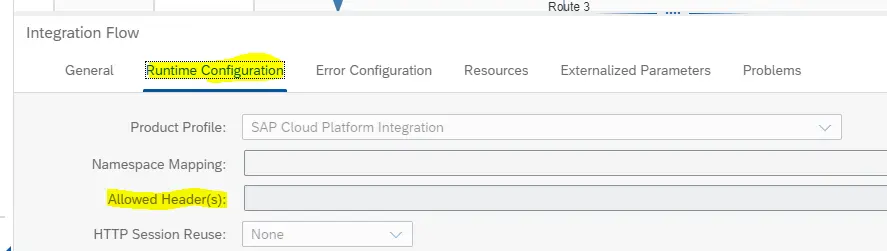
Step 14 : Click anywhere outside the Integration Process. In Runtime Configuration tab,
Allowed Header(s) : ID
This is done to retain the incoming Headers for further processing.
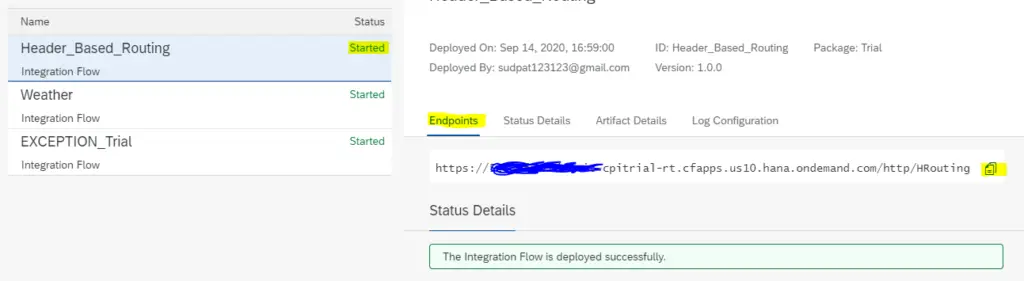
Step 15 : Save and Deploy the Artifact.

Step 16 : In the Overview Window, make sure that the artifact is in Started state. Copy the Endpoint by clicking the Copy button highlighted below.
TESTING THE ARTIFACT
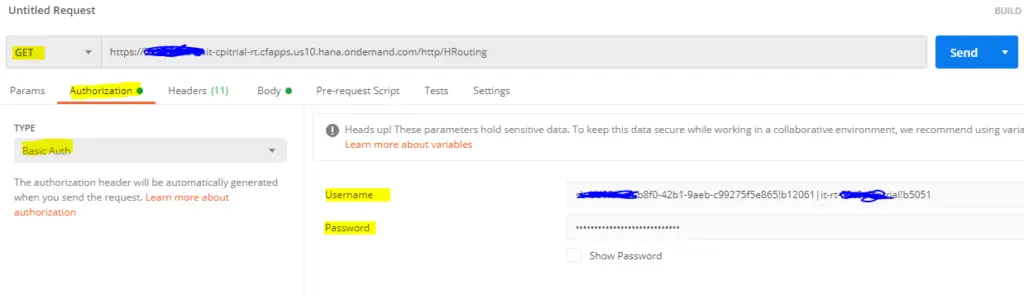
Step 17 : Open POSTMAN. Create a new request with type GET.
Paste the Endpoint copied in previous step in URL tab.
Type : Basic Auth
Username : Client ID
Password : Client Secret
Client Id and Client Secret you will get when you create Process Integration Runtime Instance during tenant setup. ( Refer Step 34 of this post )
Step 18 : In Body tab, Select Raw message, XML type. Type any custom XML message.
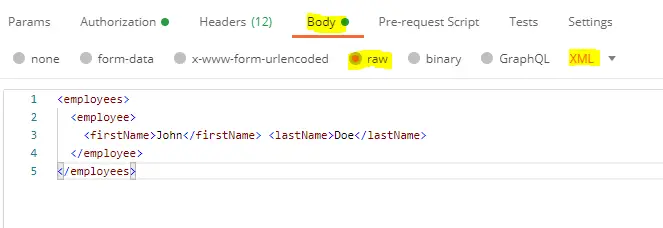
<employees>
<employee>
<firstName>John</firstName> <lastName>Doe</lastName>
</employee>
</employees>
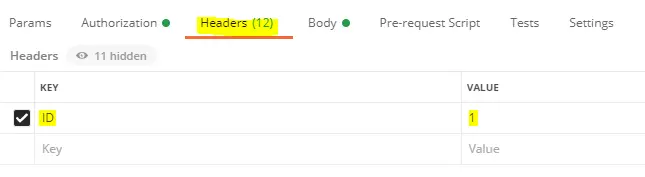
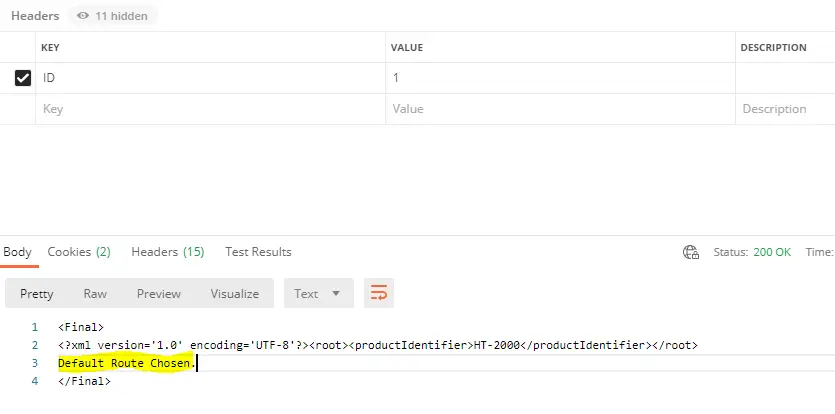
Step 19 : Under Headers, Define a header as ID with Value=1. Click on Send.
KEY : ID VALUE: 1
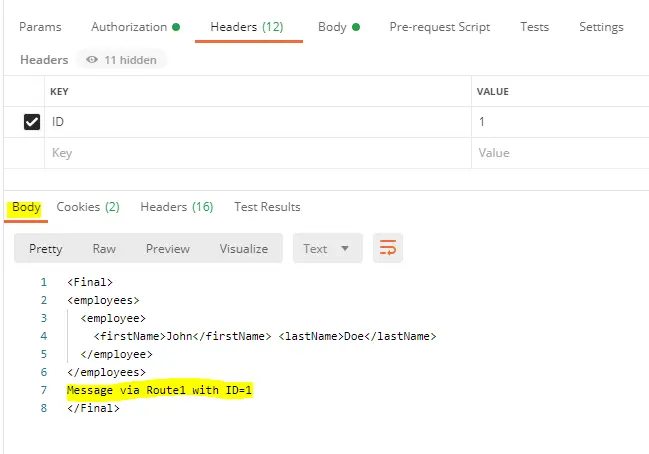
Step 20 : You will get back the Result as Below. It is evident that Message passed via Route1.
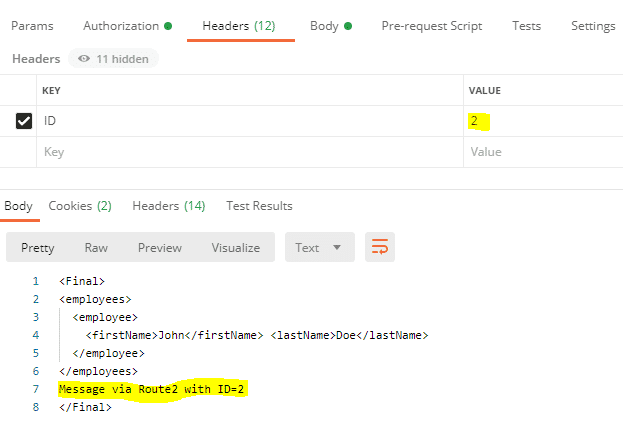
Step 21 : Change the VALUE=2 and click on SEND. You will get back the result as below. It is evident that Message passed via Route2.
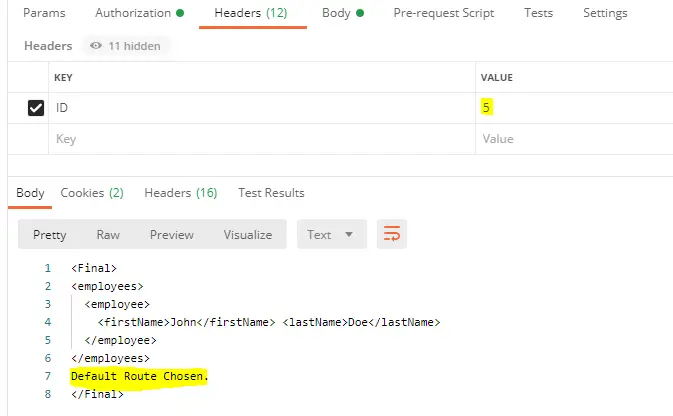
Step 22 : Change VALUE = 5 ( Any value other than 1 and 2 ) and click on SEND. You will get the Message as below. It is evident that Message passed via default Route and has called the Local Integration Process.
TESTING USING A JSON PAYLOAD
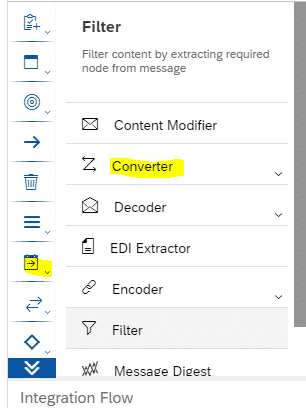
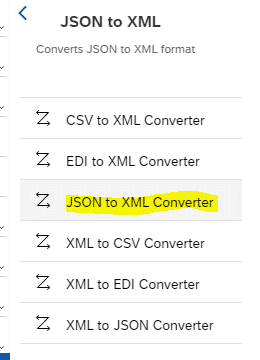
Step 23 : Go back to the Artifact. Add an JSON to XML Converter just before the Router.
Step 24 : It should look as below. Save and Deploy.
Step 25 : Make sure the Artifact is Started again.
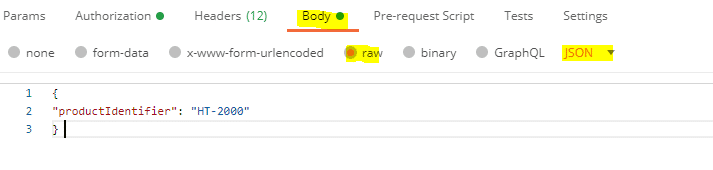
Step 26 : Go to POSTMAN. From Previous Settings, Change the Input type to JSON and write a sample JSON code.
{
“productIdentifier”: “HT-2000”
}
Step 27 : Repeat the Step 19 to Step 22. You should get the similar Results.
REMOVING ALLOWED HEADER
Step 28 : Go back to the artifact. Click anywhere outside the Integration Process. Remove ID from Allowed Headers under Runtime Configuration. ( Which was included in Step 14 )
Step 28 : Save and Deploy

Step 29 : Make sure that the Flow is started again.

Step 30 : Go to POSTMAN and repeat Step 19 to Step 22. Now Each time you will get the response as below. The flow will always take Default Route as the Incoming Headers are not retained at runtime and hence the Value in ID cannot be determined.
In Short, the Incoming Headers are not retained to be used in the Integration Flow unless its specified in runtime Configuration tab of the Artifact.
FINAL VERDICT :
In conclusion, I hope you enjoyed reading this article on “Header based Routing & Local Integration Process”, If yes, then don’t forget to spread a word about it. Do send the feedback and to know more about it. Signing off Sudarshan@recodehive.com