


GETTING STARTED
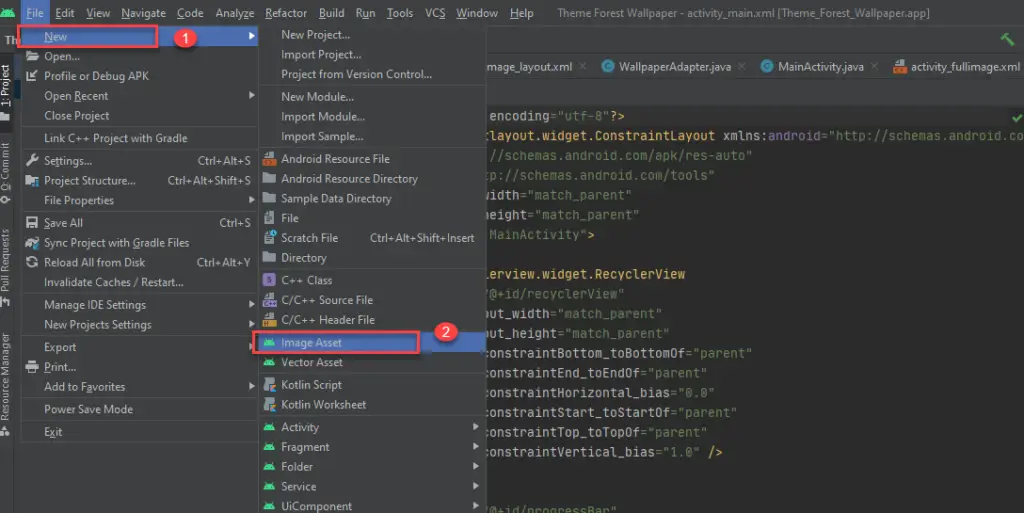
Image icon. Images you represent the brand, so it’s equally important to view as it is in Android application, there are many ways to do it. In this post we are gonna helps you to Change the app icon in Android Studio
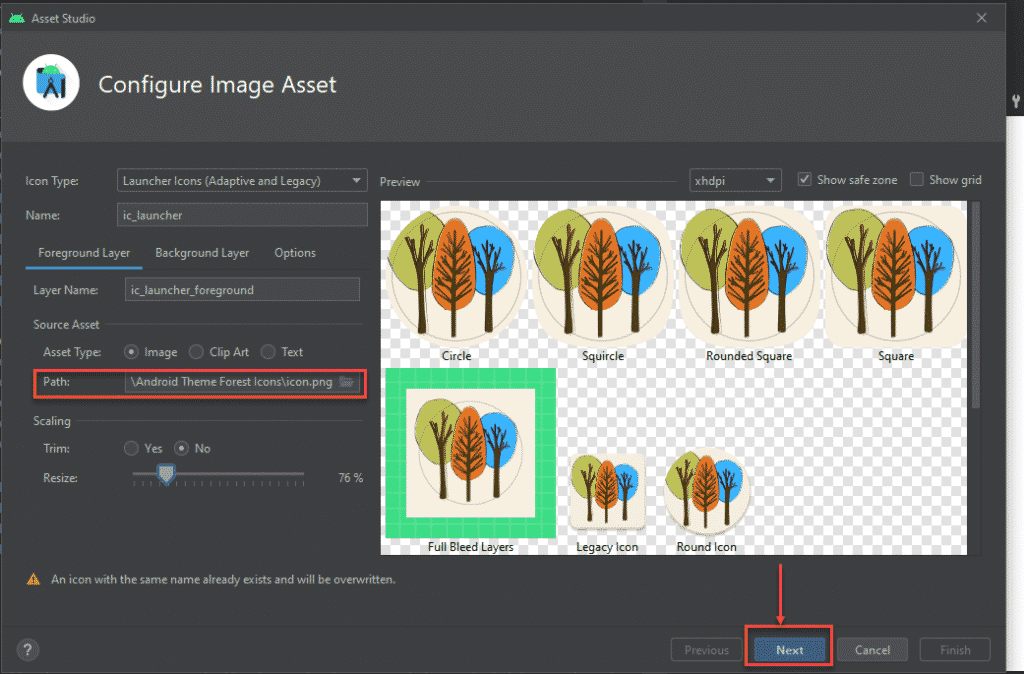
Step 2: Once you open the image asset click on the path button as highlighted below, select the app you designed from your local directory. If you have the plan to publish the app on Playstore, make sure that the app icon is not a copyrighted image, because if it’s copyrighted Google will reject your app submission.
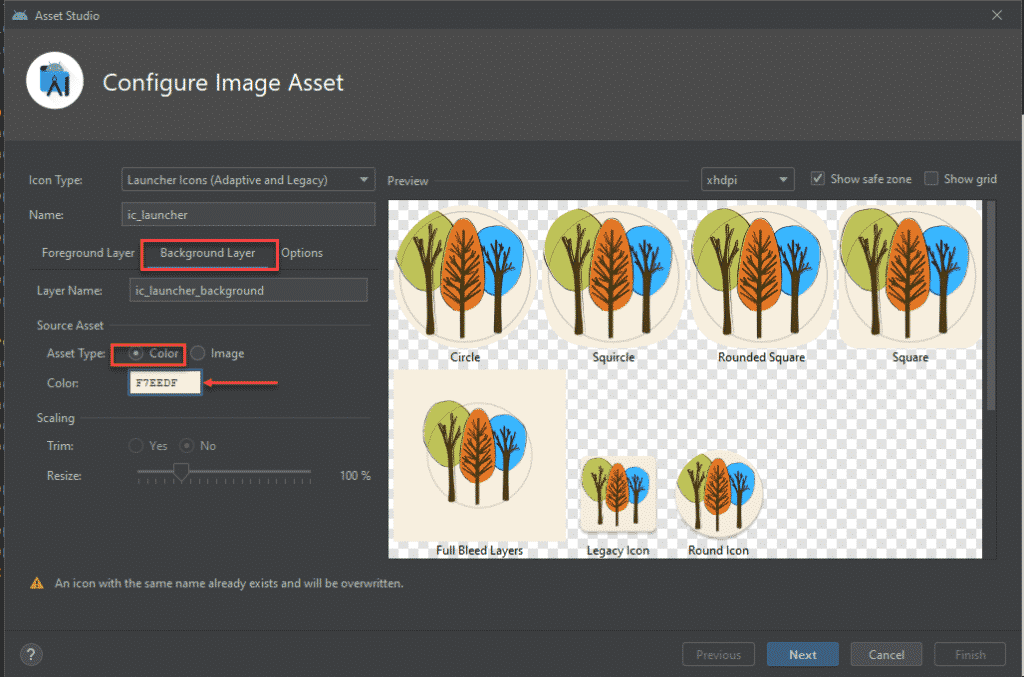
Step 3: In the above picture you can see the app icon has been changed and there is inconsistency with the Full Bleed Layers app icon, need to change the background of the same, for this click on the background layer radio button and click on a color, if you know the color code it’s better, paste the color code and click on next button.
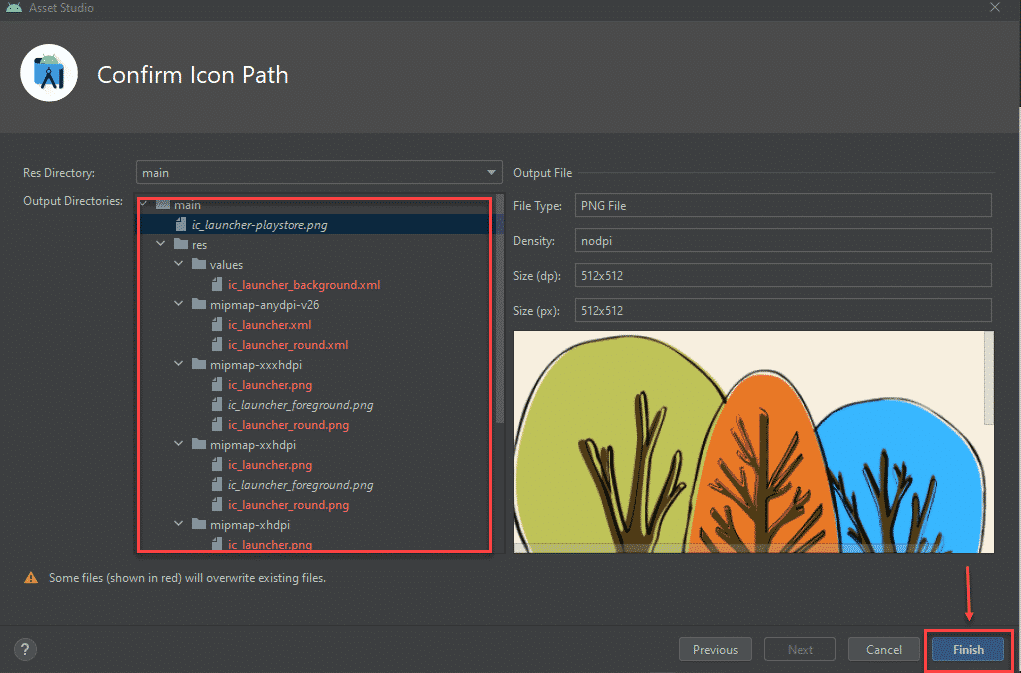
Step 4: This is the last phase of icon change all the left are folder files need to be changed, once you click on the finish button it will get saved and Gradle sync will start. you can run the emulator and check the progress.
Note: There is an alternative approach to do the same, Open Android Studio -> Right-click on res and copy-paste the folder or icon
Step 1: Go to your desktop and copy the image: Right-click -> copy file, if you don’t have the icons or images available download the non copyrighted image from the internet. If you don’t have any icons designed don’t worry you can use this website to build all kinda icons.
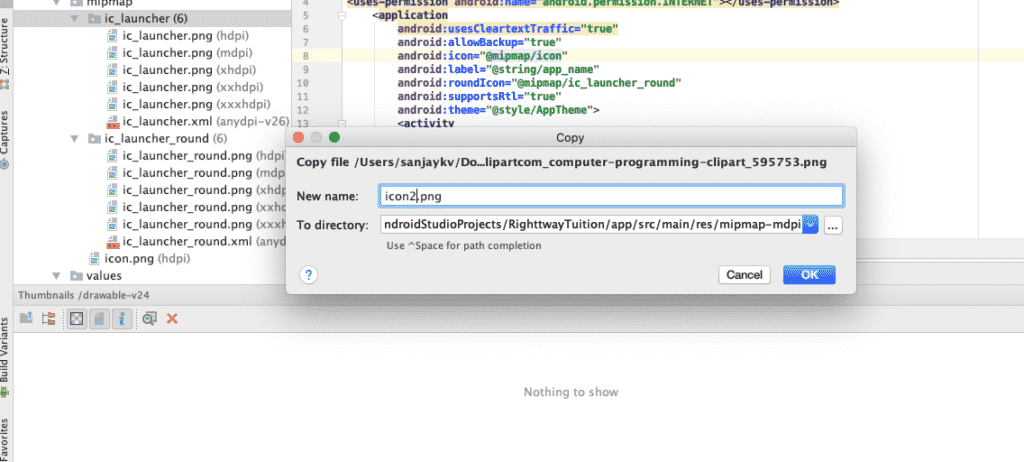
Step 2: Now come to the Android studio, and go the drawable section and right click and paste over there. Now a box will pop up asking to change the Name of the file, If you wish to change the name you can change the name. Here I’m going to change the file name to icon.png.
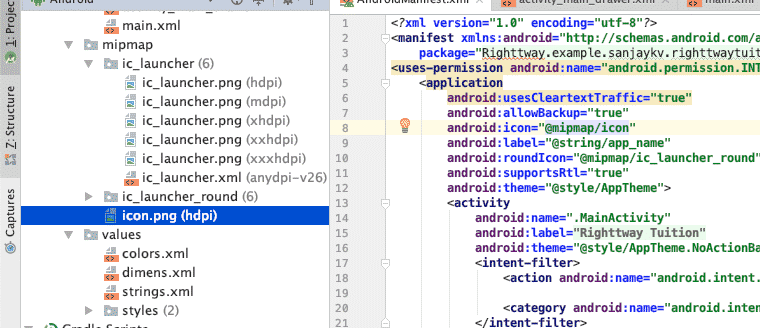
Step 3: Now go to the respective manifest file you can see android icon: and hover to the icon name over there and run the application. That’s all you need to do.

<item
            android:id="@+id/nav_camera"
            android:icon="@drawable/ic_academic"
            android:title="Academic" />
FINAL VERDICT :
In conclusion, I hope you enjoyed reading this article on “How to Change app icon in Android Studio”, If yes, then don’t forget to spread the word about it. We would appreciate if you give feedback to the mentioned Email ID. Signing off sanjay@recodehive.com