


When dealing with very large files Named range is like a boon to do the calculations and perform different functions by reducing the complexities and Ambiguity. What I mean by Ambiguity is like instead of calling cell reference you can call the name. By using named ranges makes formulas Dynamic. In this excel Tutorial, we will look into how to create Named Ranges in Excel.
Table of Contents
Types of Name Ranges in Excel
There are multiple ways to create the Named Ranges in Excel, They are defining Name Box, Define Names, Create from the selection. When you deal with a very large amount of data usage of creating from selection Helps. Let’s look into more details of these.
- Name Box
- Define Names
- Create from selection. CTRL+SHIFT+Down Arrow
Create name ranges using Name Box in Excel.
Select the column with ranges, instead of drag and drop you can click on the top cell and press the crtl+shift+down arrow to select the entire range, Now Moved to Name Box and Type the Name. In the below example you can see the B5 value in the Name box I replaced the entire range name as Payslip.
Shortcut to select the cells.
CRTL + SHIFT + Down Arrow in Windows
CMD + SHIFT + Down Arrow in Mac
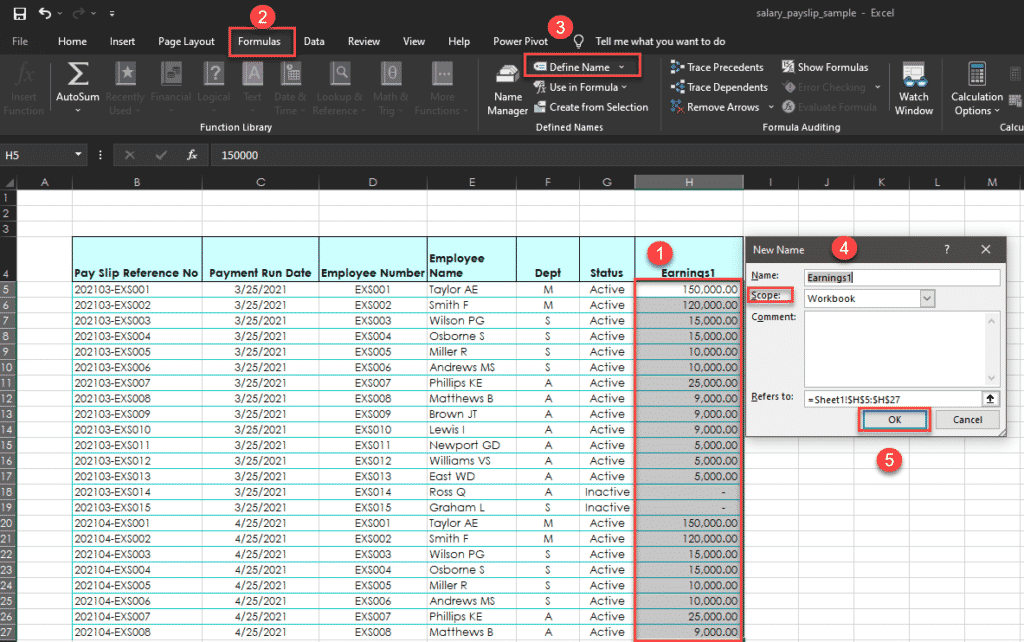
Create name ranges using Define Name in Excel.
This is much more similar to the above step, One advantage over the name box is that we can define the scope of the range within the workbook or worksheet. Select the column using shortcut keys Click on Define Name from Formula Tab as shown below. On Scope selection, you can define within the worksheet or workbook.
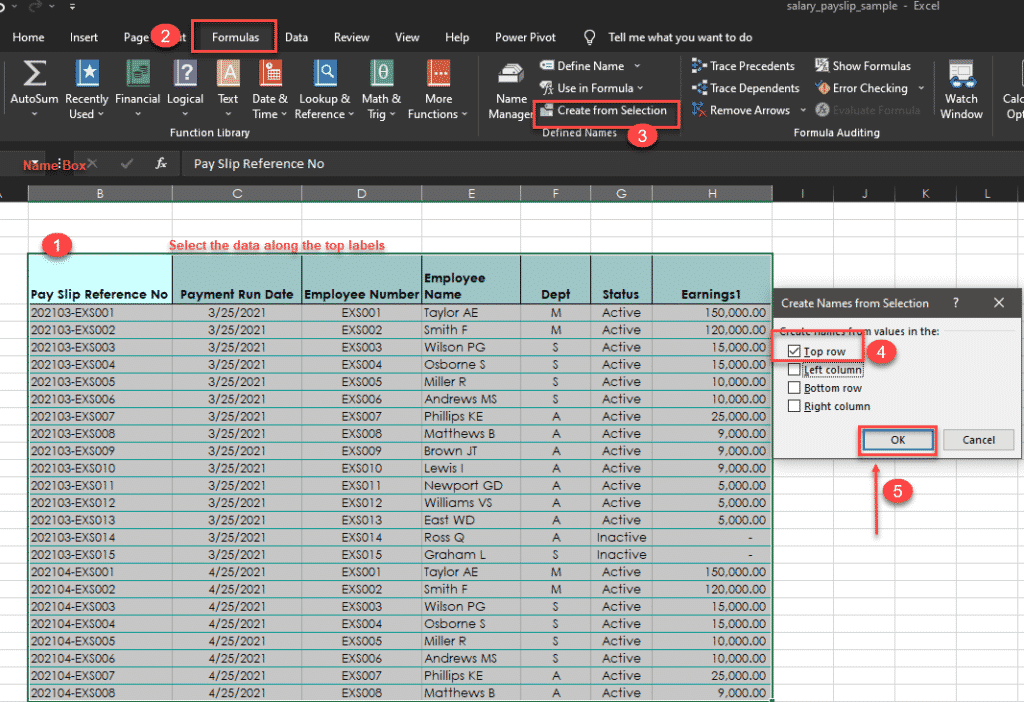
Create name ranges using Create from Selection in Excel.
Create from the selection is used to select the multiple ranges simultaneously. This is really helpful when the data is big. Select all the range using the short cut key crtl+shift+ down arrow, then got to Create from the selection on Formula Tab, There is a shortcut key to access Create from a selection which is CRTL+SHIFT+F3.
then remove the Left column only check the Top Rows. Now go to the Name box all the Named Range will be appearing there. Keep in mind I selected the data this time along with Labels. There are automatic Naming conventions, For example, you can see E column with the label as Employee Name, Now if I use Create from selection Name range will define as Employee_Name
Advanatages of using Names Range in Excel
Named range helps to make the excel workbook more readable, easy to debug and execute the formulas. For this named range there is certain Nomenclature to be followed. All the label names should start with Alphabet or underscore(_), Names cant be more than 255 characters long.
FINAL VERDICT :
In conclusion, I hope you enjoyed reading this article on “How To Create Named Ranges in Excel”. You can refer to our Excel Tutorials for beginners to learn other Excel functions. Signing off Sanjay Kv