


This is a continuation of the previous post, We have already created a repository on the same, if not refer to this Tutorial to get started. We are going to give a custom domain to the website you have hosted before.
Table of Contents
What is Custom Domain
By default when you upload a repository and host using GitHub pages, It will be as shown below. If this is a company name or a static portfolio page this may not appeal well. So you will have an option to customize this with the domain you want to be, for example, .com, .in, .io, etc.
repo-name.github.ioStep 1: We will be creating Custom Domain in Godaddy. For this head to GoDaddy.com and search for the domain you wanted and purchase it. Here you can see I have purchased the domain called sanjaykv.com. Once you purchased a domain you can see the My products Dashboard like this.
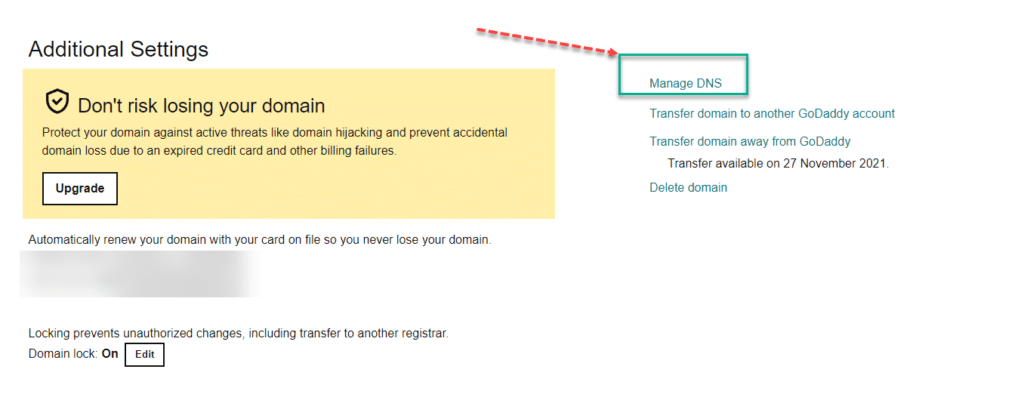
Step 2: Head to Manage my domain under the My Products tab.

Step 3: Scroll down on the next page that will be redirected after clicking on Manage My domain, then click on Manage DNS as highlighted.
Step 4: Now you need to add the below, you may wonder why this change is required. Here you are going to redirect Github Server to the Custom Domain Godaddy server.
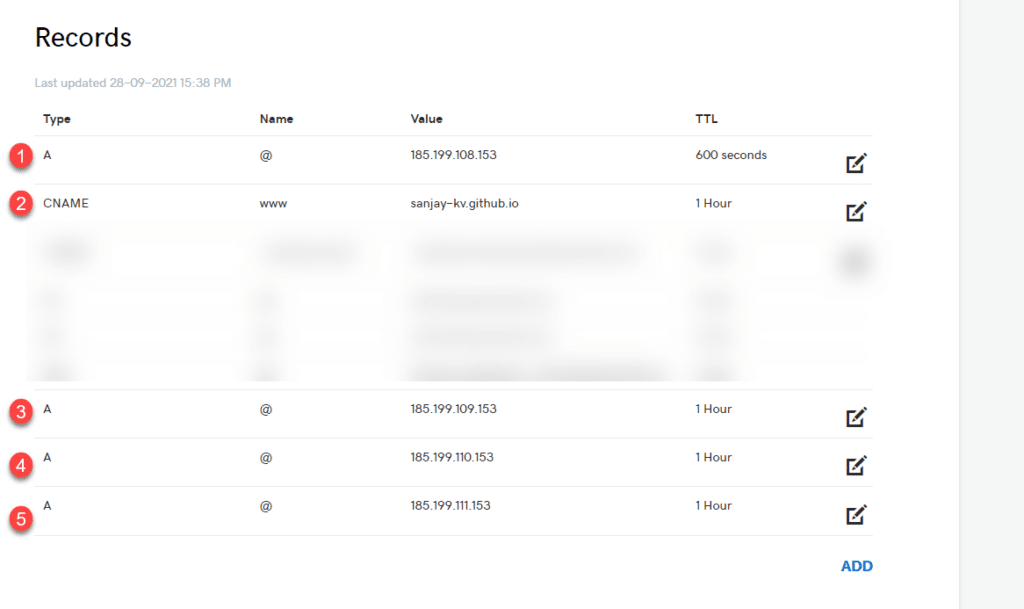
- In the Type section “A” row update the (Points to) IP address to: 185.199.108.153
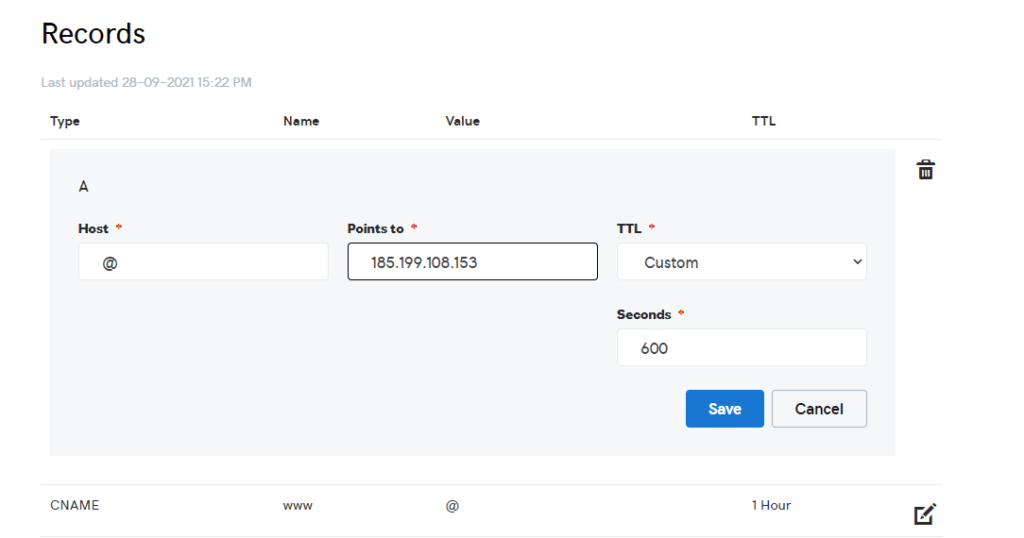
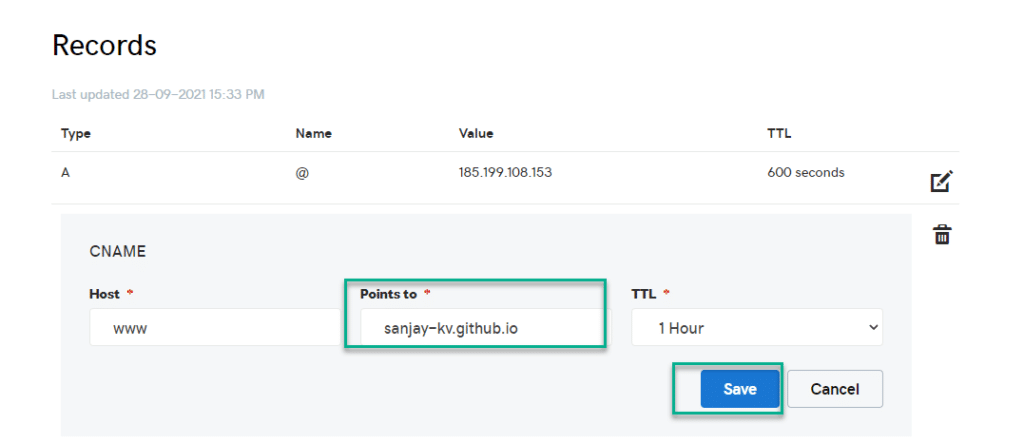
Step 5: In the CNAME row with Name “www” input your gh-pages website (username.github.io). The Steps have been detailed in the below screenshots.


Step 6: click the “ADD” button and make 3 more Type “A” rows with the IP addresses of:
185.199.109.153, 185.199.110.153, 185.199.111.153
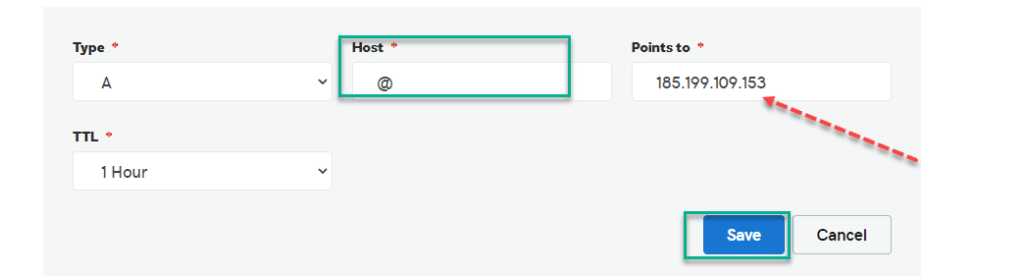
In the above screenshot, you have seen adding the IP of 185.199.109.153, repeat the steps two more times to increase the 185.199.110.153, 185.199.111.153.
Once you add, it will look something like this now.
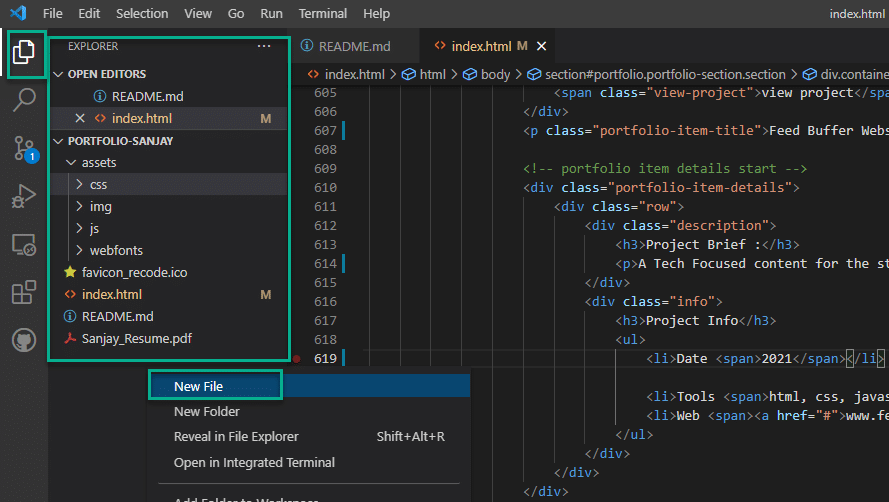
Step 7: Now the things with Godaddy Dashboard are done. You need to add a CNAME file to the local repository and push it to the remote repository. I have used visual studio for this purpose.
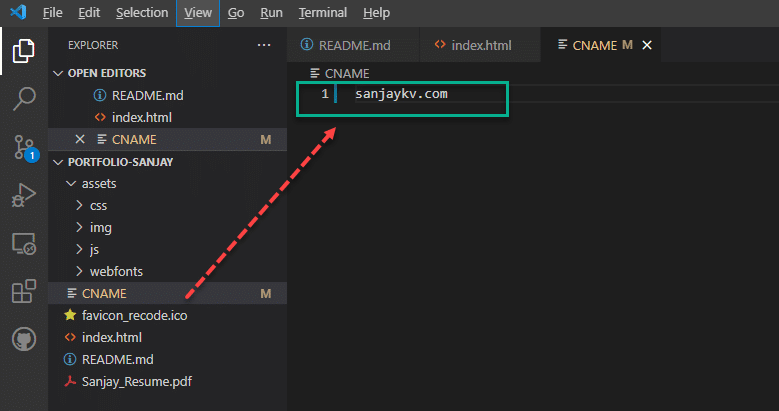
Step 8: In the next step ad the custom Domain name in the repository.
Step 9: Save it Add, commit, and push your changes to GitHub.
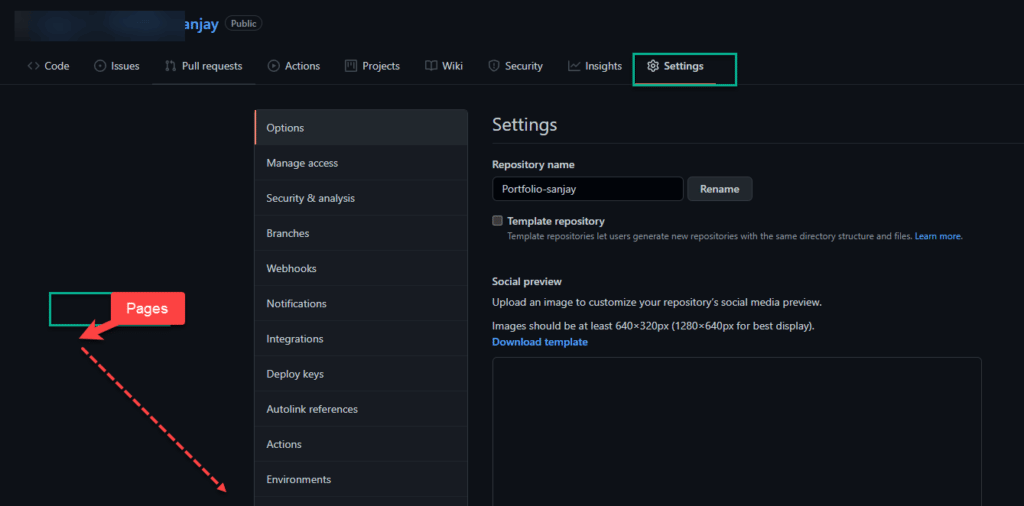
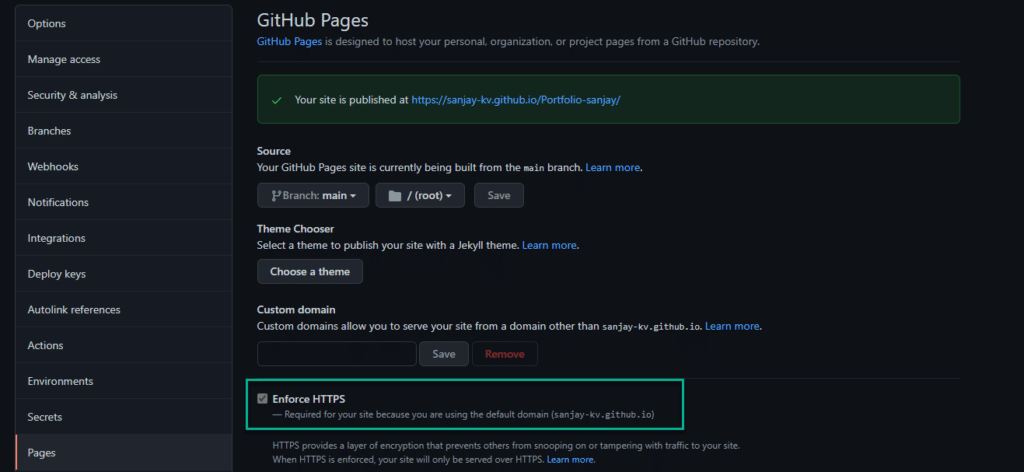
Step 10: Once you did the push, go to the settings of the GitHub repository.
Step 11: Make sure the Enforce HTTPS is checked. If not then SSL certificate. Once this is done your custom domain will work instantly.
Fixing the Error while Setup Custom Domain
You can confirm that your DNS is set up correctly by using dig the command, In case you are facing some issue has mentioned below or the custom domain not working. Make sure the CNAME pasted is correct or not.
Dig custom-domain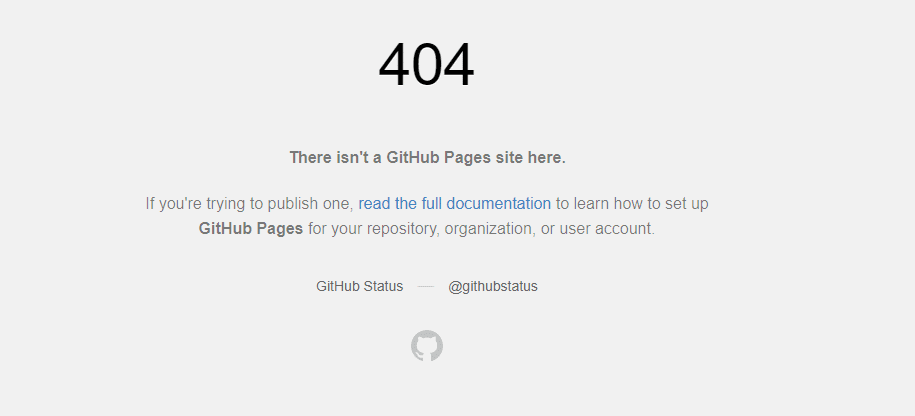
FINAL VERDICT :
In conclusion, I hope you enjoyed reading this article on “How to Setup Custom Domain on GitHub Pages” Let us know in case you find any issues in executing the above steps. Signing off Sanjay Kv