


Table of Contents
Prerequisites
- You should have a purchased domain with if not yet done use the tutorial to get one.
- Must have a purchasing plan
Understanding Hosting Service
Before getting started with hosting a website, need to understand there is plenty of services available in the market now, few of the service are Hostgator, big rock, GoDaddy, Siteground. You should be careful before buying a hosting service because reliability is very important, you need to check the facts like uptime they are providing, speed, latency, etc. this all affects your website loading speed.
Let’s get started.
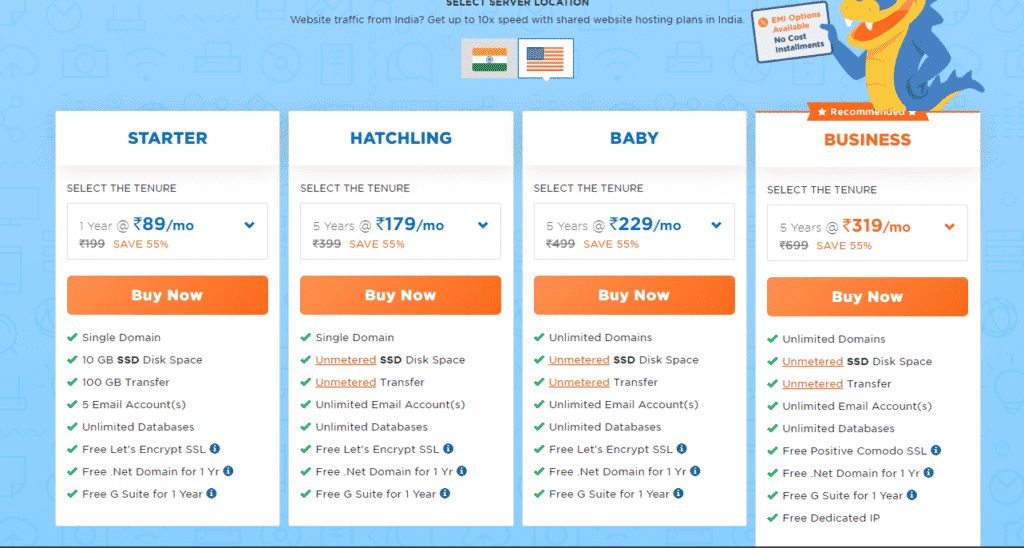
Step 1: Here I opted to go with Hostgator when comparing another service this provides a much low price and the price will go down more when you go for shared service. Open the Hostgator now you can see the plans as shown below, select the plan you would like to go with.
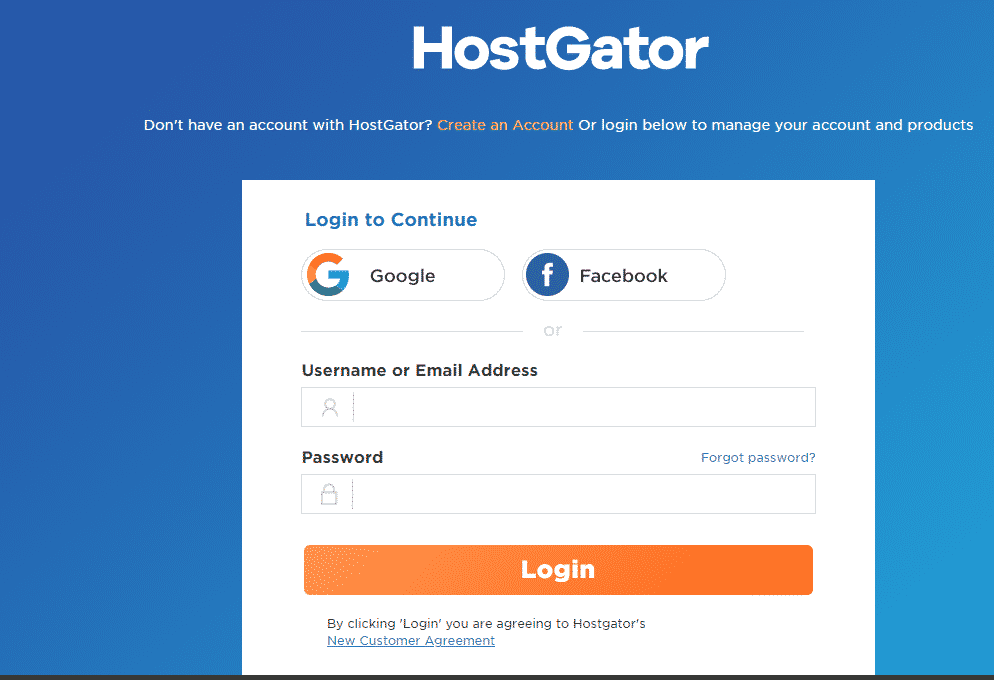
Step 2: Once you click on account it will ask you to create an account or signup with Google or Facebook to do what is convenient to you. Make sure you create the account and remember the password. We need to come back to do other configurations and setting up WordPress in Cpanel.
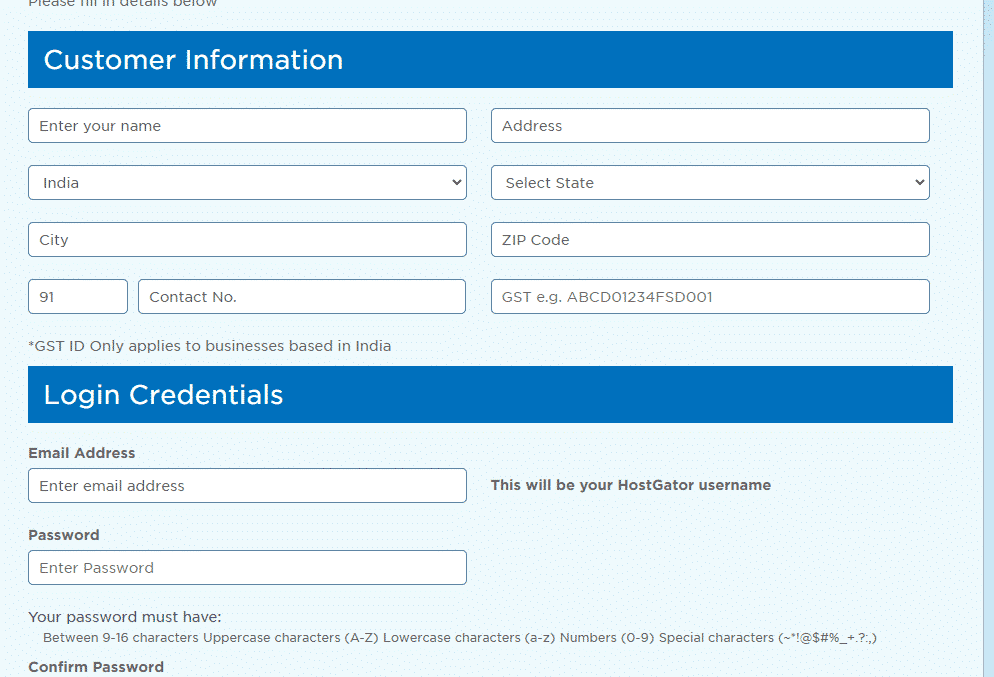
Step 3: Once you click on the signup it will ask you for the details, this details the service will use to print the invoice for the purchase every time you make through godaddy.
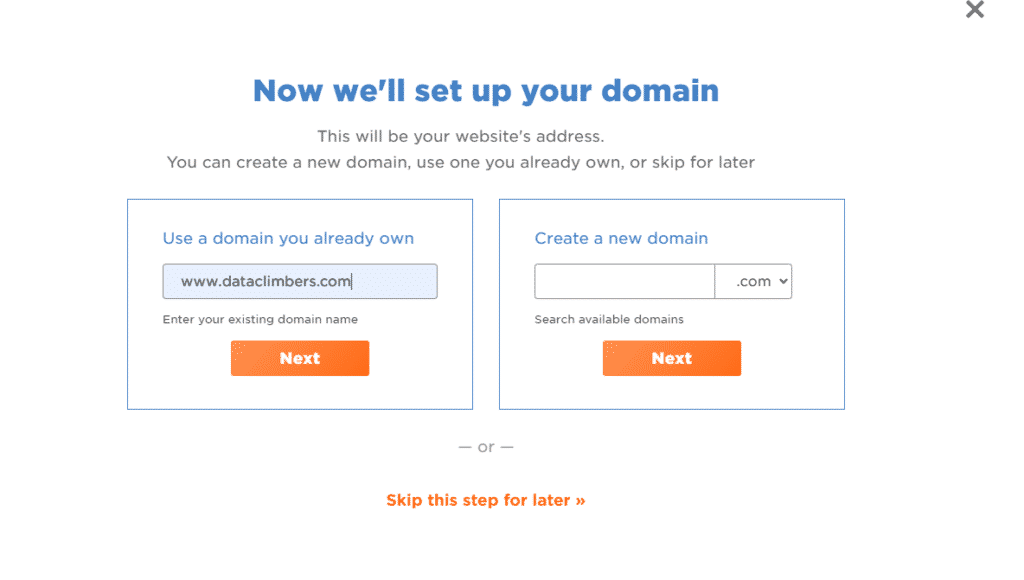
Step 4: Now it’s the tricky part if you have already purchased the domain enter on the left box if you don’t have a domain with you click on the right box and enter the domain you would like to buy. I’m anticipating that you already have a domain with you on hand so type the domain you own. Here I own a domain called dataclimers.com
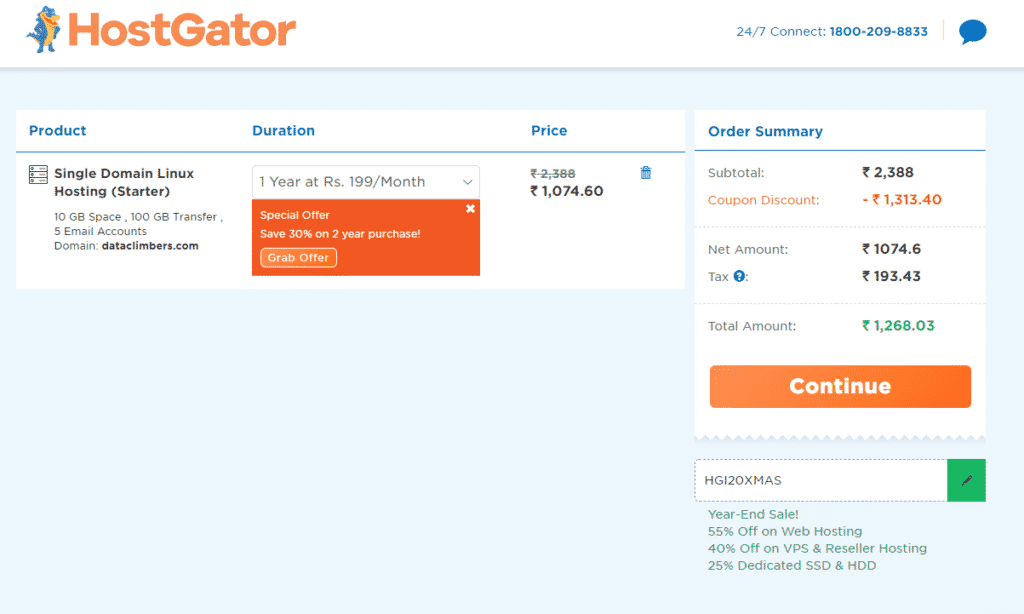
Step 5: Here you can see o opted for a single Linux Hosting service with 10 GB space with 5 email accounts with 100 Gb Data transfer rate. You can also apply coupons while checking out. use the link here to get some coupon codes.
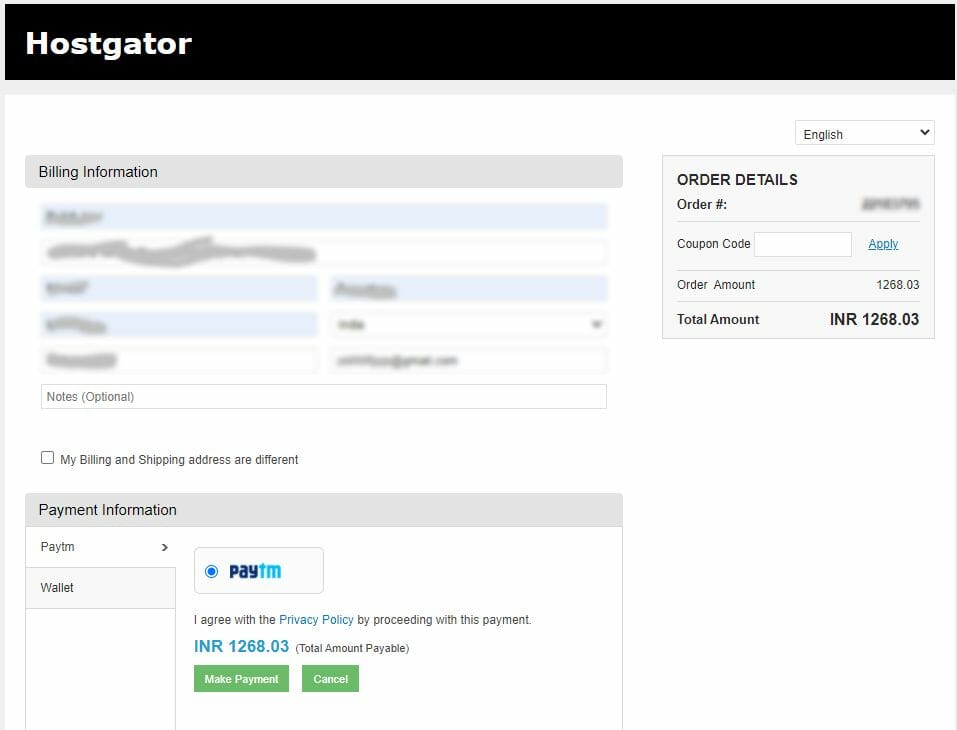
Step 6 Check out online with internet banking as shown below. Once payment is done go to the hostgator home screen as shown below.
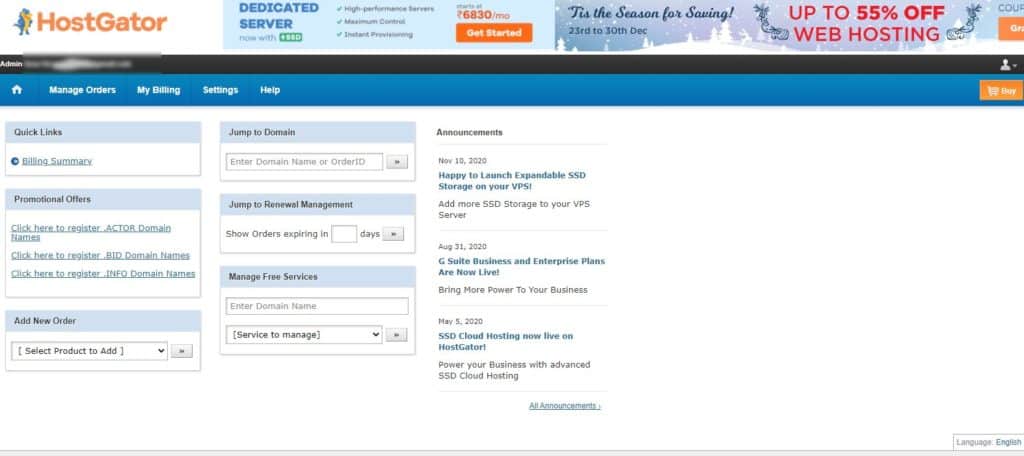
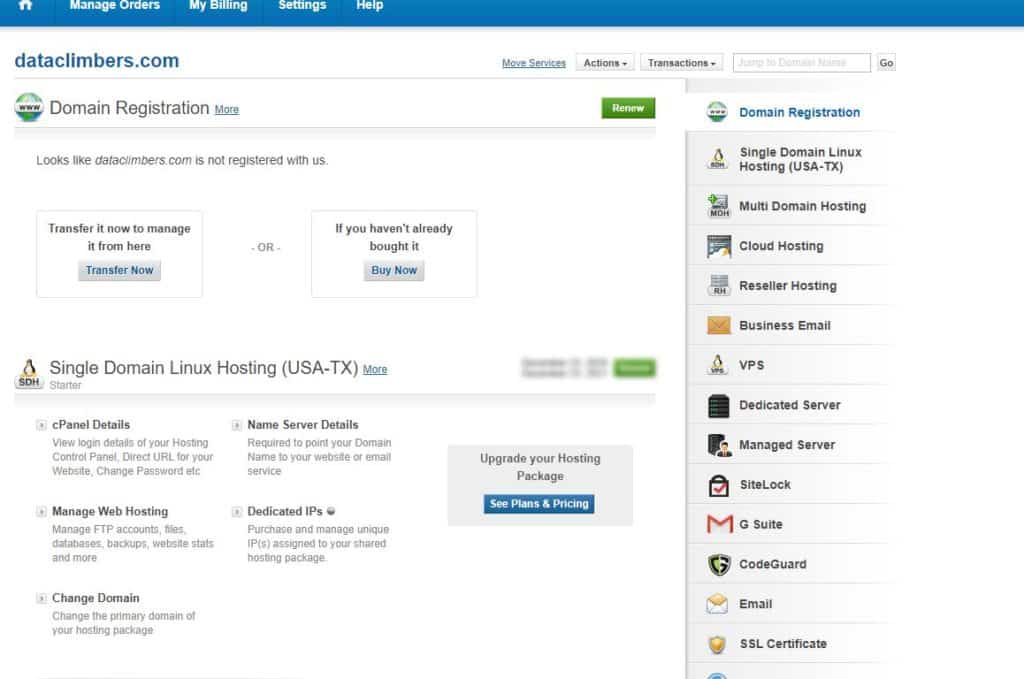
Step 7: Click on manger order you can see the list of order you purchase with expiry date
Step 8: Click on the Name server Details, and get the server details. In this scenarion i have purchased my domain from Godaddy and Hosting server i purchased from the Hostgator, now need to link both. So Name server Details will help us to do this task.
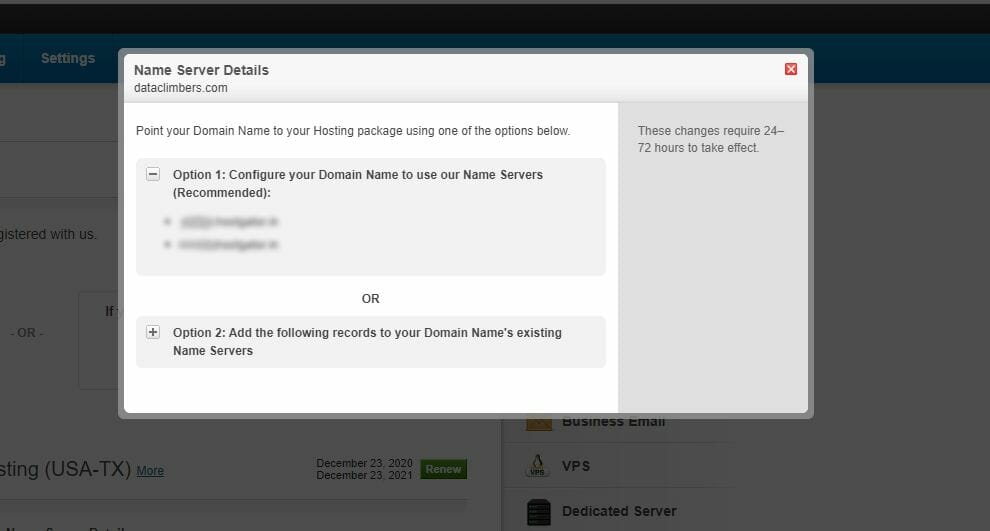
Step 9: In option 1: you can see 2 name server details, copy those details and go to your domain service, here i have bought it from the godaddy and went to My purchase and DNS Management.
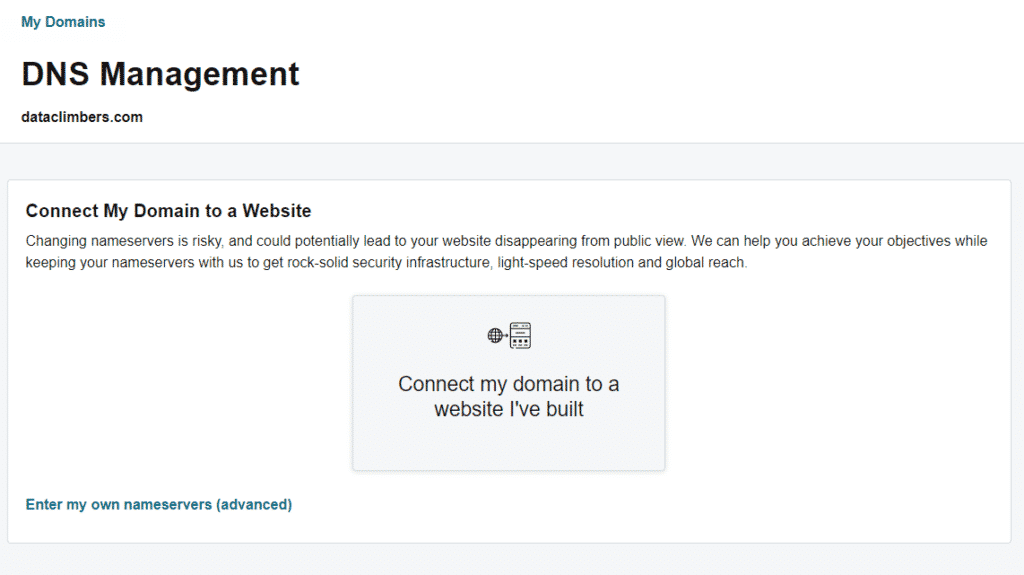
Step 10: Once you click on the DNS Management in the godaddy below you can see an option called Enter my own nameservers (advanced) click on this option.
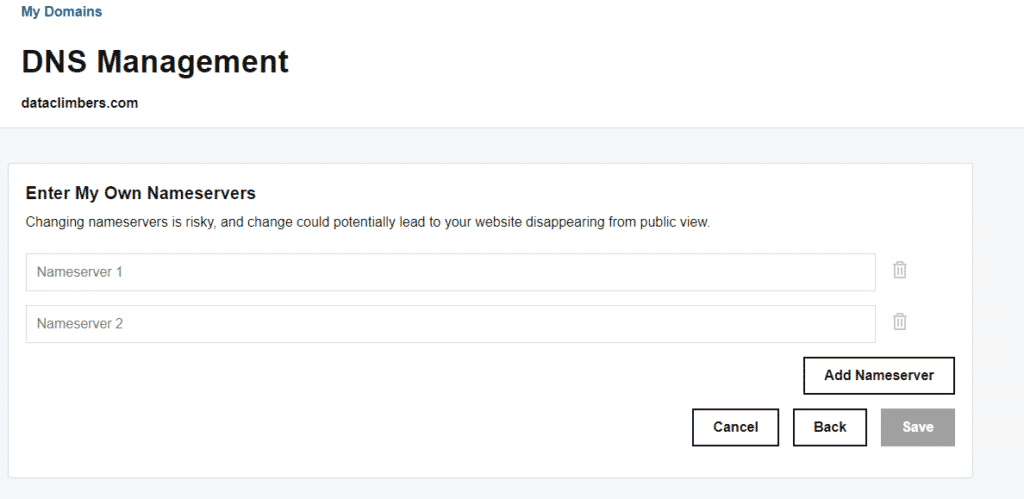
Step 11: Go ahead and paste the server details here in the section Nameserver 1, Nameserver 2 and click on Save.
FINAL VERDICT :
In conclusion, I hope you enjoyed reading this article on “How to Host a website – Beginner Tutorials”. In the next post, you will be able to see how to use WordPress to create a stunning website. Signing off Sanjay Kv