


As mentioned in the previous Studio 3T installation Tutorial it’s the best GUI for MongoDB. This post will have a look at how to configure Studio 3T and import a JSON file and perform Queries.
Though there are many alternatives to Studio 3T like MongoDB Compass, Mingo.io, PhpMoAdmin, Studio 3T stands out with its easy-to-use UI and many other features.
Connection Setup
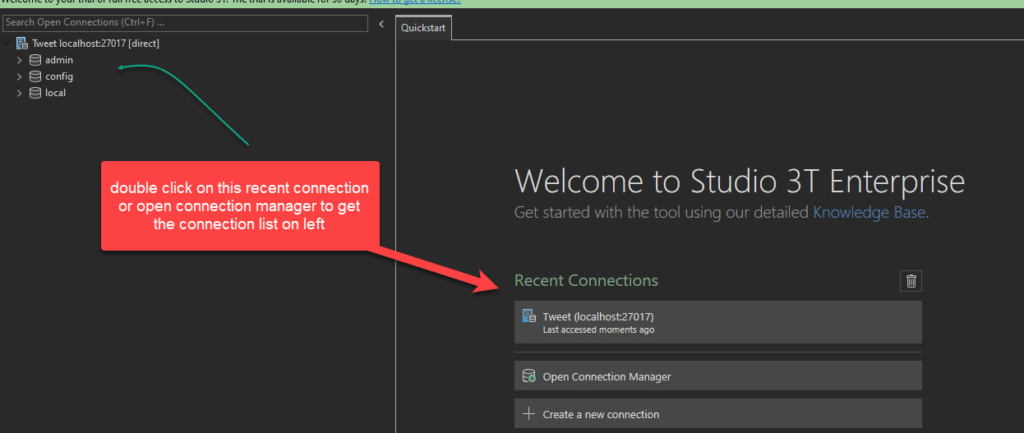
Step 1: Double click on the connection which you set up earlier. This will open up the existing connection on the left side of the screen.
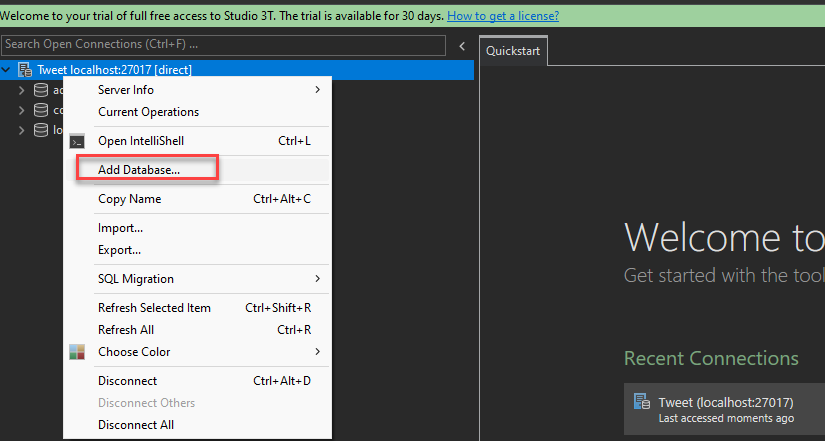
Step 2: Create a new database (Right-click the connection name, i.e., ‘Tweet localhost:27017‘, the name will be different based on what name you gave for the connection while you setup then click ‘Add Database…’)
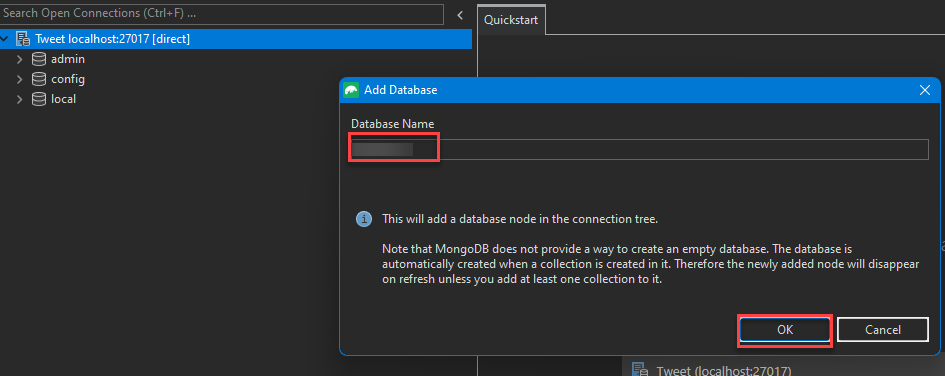
Step 3: Give the Database you want to be as this is the demo one, im going to give the name Practical_1. Click on Okay once you done the setup.
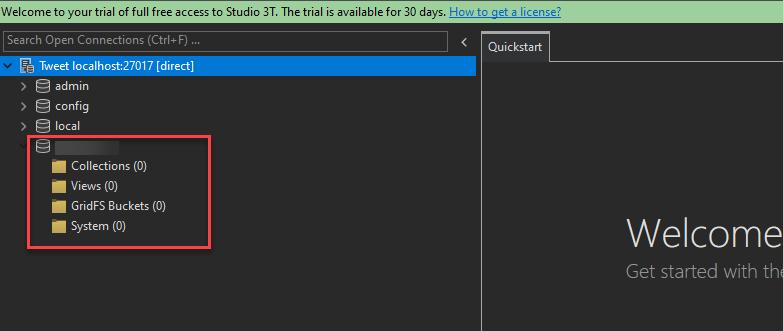
Step 4: You can see the new database created along with few folders inside.
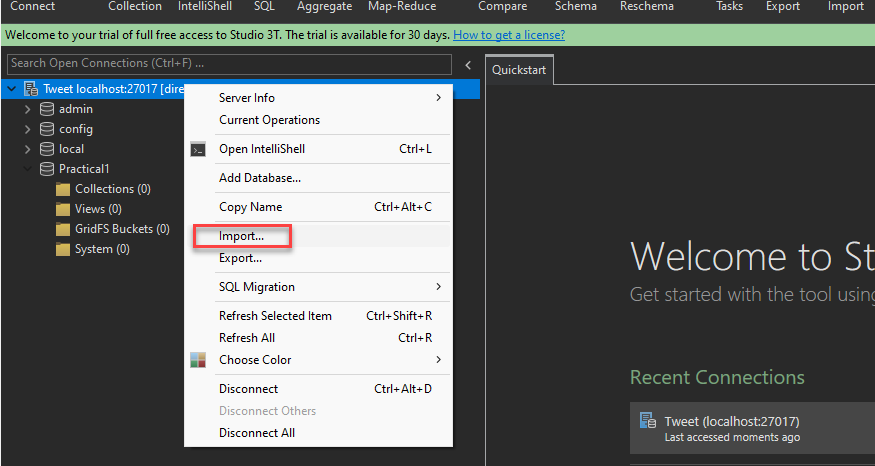
Step 5: Right click on the database and click on the import button to import the file to your system.
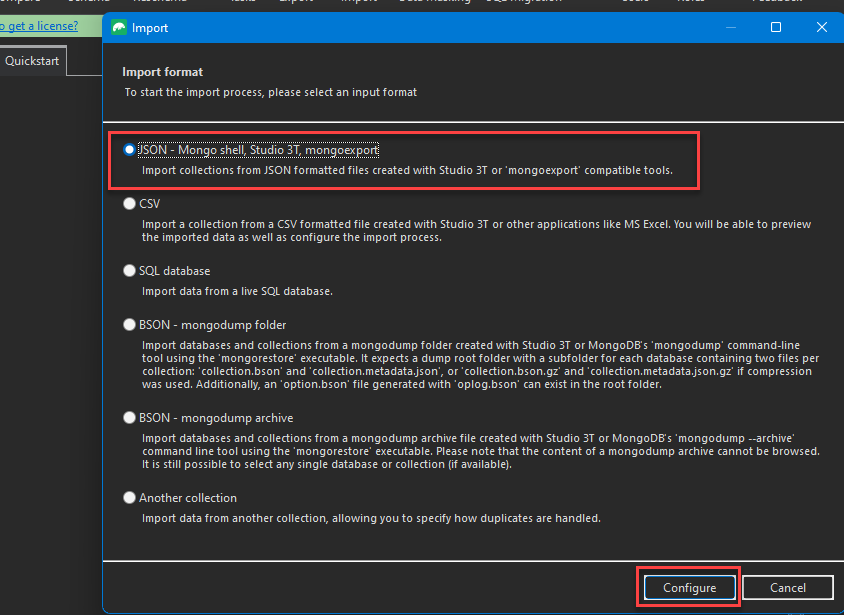
Step 6: Now i have a json file with me, to import the JSON file click on the first option and click on configure. Now the new screen will open with Query table.
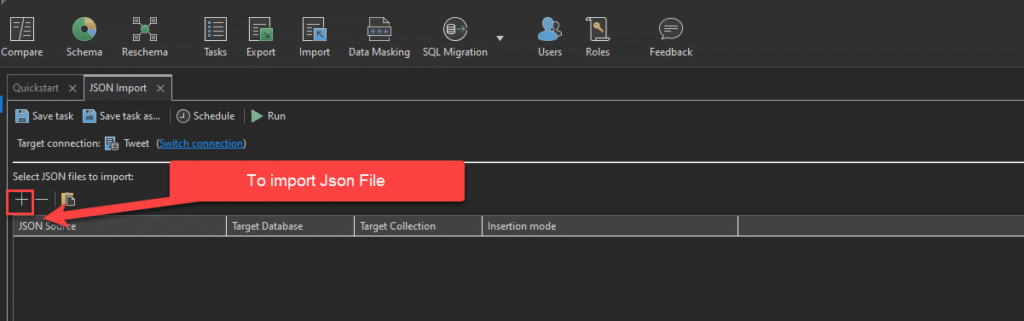
Step 7: Click on the + sign to import the Json file to the screen.
Step 8: Click on the Run button, you will get a pop up window saying Confirm the import “In total, 1 import unit will be run” Click on okay and proceed.

Step 9: Double click on your sample Json file to see the Json code. We will look more into the UI explanation in the upcoming posts.

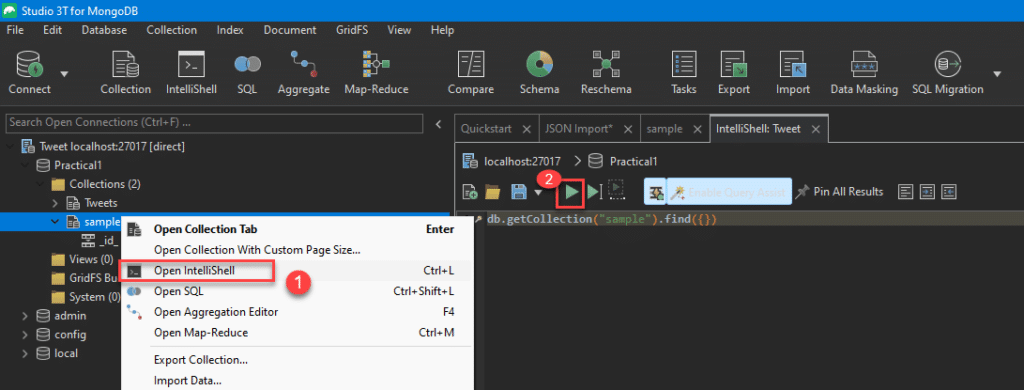
Step 10: To write queries opent the Intellishell, this can be done by right clicko the sample Json file you imported. The code you see on the right side if executed will produce relevant output.
Step 11: You can save the script by from the file menu. The script will be then available on the database folder created in the connection.

FINAL VERDICT :
In conclusion, I hope you enjoyed reading this article on “Configure Studio 3T Tutorial“, In the upcoming Tutorials we will look at the UI of Studio 3T and how to get the free 1 year Licence. Signing off sanjay@recodehive.com